Blog
- Details
Some OSes, such as Windows, prefer carriage returns and new lines: (\r\n)
While others, such as Linux and Mac, prefer new lines: (\n)
This default preference is not a problem, until you start sharing code across OSes using a version control system, like git.
For example, if your Windows ide enters \r\n for new lines, or worse, on save converts all lines to \r\n, while another developer's Linux ide enters \n for new lines, and also on save converts all lines to \n, the version control system will mark all affected lines as changed, when really it was just line endings.
To minimize the unintentional changing of line endings:
1) Developers can agree on the desired line ending and adjust their ide to save as such. The desired line ending often depends on whether the target OS for the code is Linux or Windows, matching the OS preference.
2) Git by default can help manage line endings on commits and checkouts,
by setting the config flag: core.autocrlf
config.autocrlf=true
If you’re programming on Windows and working with people who are not (or vice-versa), you’ll probably run into line-ending issues at some point. This is because Windows uses both a carriage-return character and a linefeed character for newlines in its files, whereas Mac and Linux systems use only the linefeed character. This is a subtle but incredibly annoying fact of cross-platform work; many editors on Windows silently replace existing LF-style line endings with CRLF, or insert both line-ending characters when the user hits the enter key.
Git can handle this by auto-converting CRLF line endings into LF when you add a file to the index, and vice versa when it checks out code onto your filesystem. You can turn on this functionality with the core.autocrlf setting. If you’re on a Windows machine, set it to true – this converts LF endings into CRLF when you check out code:
> git config --global core.autocrlf true
config.autocrlf=input
If you’re on a Linux or Mac system that uses LF line endings, then you don’t want Git to automatically convert them when you check out files; however, if a file with CRLF endings accidentally gets introduced, then you may want Git to fix it. You can tell Git to convert CRLF to LF on commit but not the other way around by setting core.autocrlf to input:
> git config --global core.autocrlf input
This setup should leave you with CRLF endings in Windows checkouts, but LF endings on Mac and Linux systems and in the repository.
config.autocrlf=false
If you’re a Windows programmer doing a Windows-only project, then you can turn off this functionality, recording the carriage returns in the repository by setting the config value to false:
> git config --global core.autocrlf false
Note: Above 2) sourced from Git Book
This is the recommended option if you want to manage line endings yourself; no magic = good
Note: You can also manually edit the git global config by editing the file in
> echo C:\Users\[username]\.gitconfig
[user]
name = first last
email =
core]
autocrlf = true
Further reading on StackOverflow
- Details
Node.js is a JavaScript runtime which uses an event-driven, non-blocking I/O model.Node.js can be an alternative to Java, PHP, .Net, Python, etc to develop web sites and applications using best convention frameworks such as Express.js, desktop applications using Electron.js, mobile apps using Ionic.js or React Native, to name a few of the possibilities.
Node.js is often referenced as just Node, but for easier internet searching, it is best to stick with nodejs.
Note: Node.js can be installed on multiple platforms, but if you are going to use Node.js to develop mobile apps and you want to be able to use an hardware emulator to test your development, you will need to install Node.js in your Host computer, and not a Guest VM.
Follow this guide to install Node.js in Windows 10
After installing Node.js, let’s go over some background information about React Native and the components required to go from React.js Javascript to a native mobile app.
Note: Xcode, for IOS in Objective-C, and Android Studio, for Android in Java, are the standard development tools to create mobile apps for their respective platforms. React Native on the other hand, utilizes Javascript and compiles to both IOS and Android platforms.
Note: If you are looking for a somewhat similar mobile development using Angular.io, Ionic is a solution which uses Cordova for mobile hardware access. Ionic produces a web view app as opposed to a native app provided from React Native.
That’s it for the high level overview.
To install React Native,
Make a directory to store your apps, and change to that directory
> cd C:\Dev\ReactNativeApps
Install the tool Create React Native App
> npm install -g create-react-native-app
Create your first app
Warning: Renaming your React Native app is not simple with about 12 steps to be performed.
But for this initial app to just play with, any name will do.
The tool create-react-native-app will install related libraries so this may take a minute.
> create-react-native-app dev-app-01
Change to the new app directory created
> cd dev-app-01
Install and update associated libraries and start Node.js
> npm start
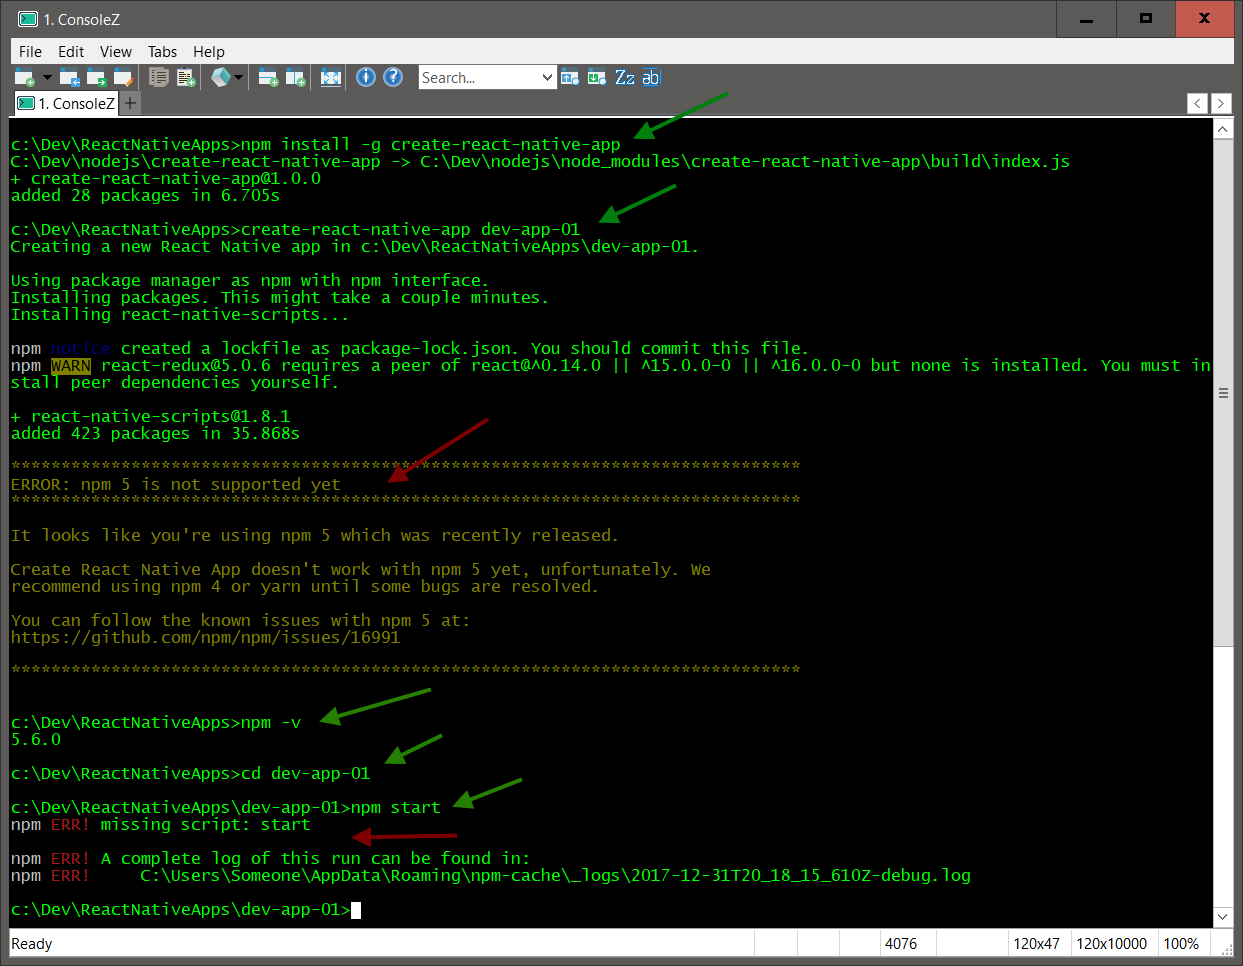
Warning: If you installed Node.js 8, you will most likely have the latest npm which is version 5
However, React Native does not currently work with npm 5, but it does work with npm 4.
To downgrade npm in windows, you need to start the command prompt with Administrator privileges.
Right click on command prompt shortcut and choose Run as Administrator
> npm -v
5.5.1
Downgrade npm to version 4
> npm install -g npm@4
> npm -v
4.6.1

Delete your prior app directory
C:\Dev\ReactNativeApps\dev-app-01,
and recreate it
> create-react-native-app dev-app-01
> cd dev-app-01
> npm
startPackager started!

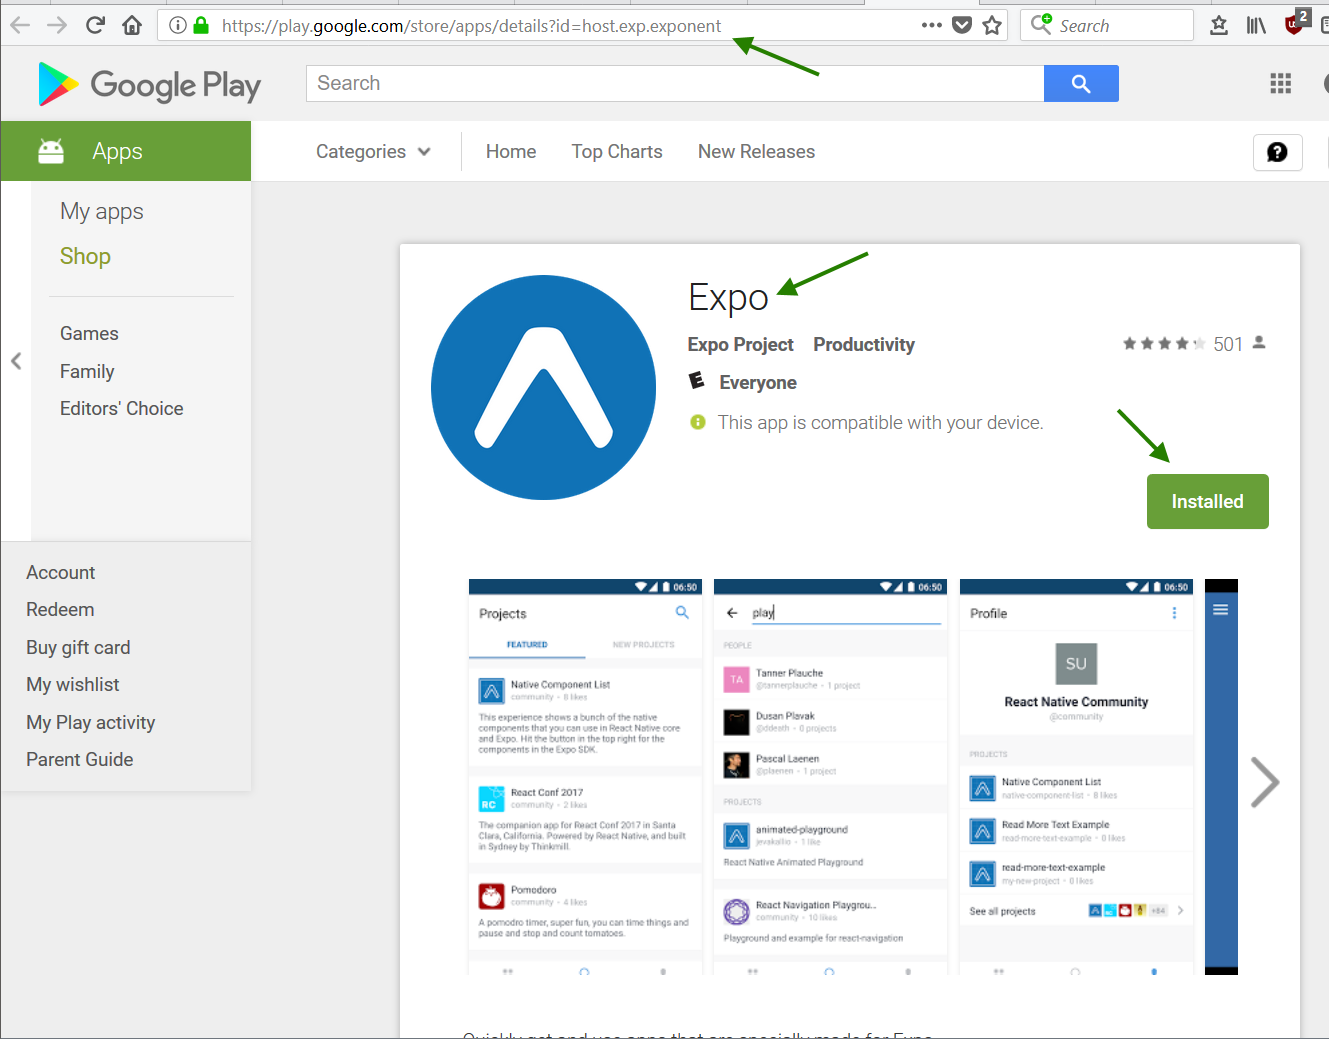
Now you need to install the development app for Expo.io.
Note: The Expo app is only to facilitate development. As you make changes to your code, and save, your changes will automatically be deployed and reflected within the app on your mobile device. So you do not have to run a hardware emulator, or install any mobile platform tools. When you are ready to build your app, you will not use the Expo app, but you will end up with your own app.
Expo @ Google Play Store
Expo Client @ Apple App Store
Open the Expo app on your phone, and click Scan QR CodeScan the QR Code that is in your terminal

If your app loads, great!, if it times out, then maybe your phone and computer are not on the same network.
Warning: The network interface React Native binds to may not be the same wireless network as your computer. This will most likely occur if you have multiple network devices from installing Virtualbox or a VPN.
Type ipconfig to see your network devices
> ipconfig

You can either change the network priority, or forward the port
To change the network priority, open the Control Panel and navigate to:
Control Panel -> Network and Internet -> Network and Sharing Center -> Change adapter settings
For each network connection,
Right click -> properties -> Edit ipv4 properties -> click Advanced -> Uncheck Automatic metric
For your primary network connection, the one which the Expo app on your phone will connect to, enter a lower unique metric, such as 10. For the other network connections, such as Virtualbox, enter a larger unique metric, such as 20.

Stop React Native, from the command prompt,
Ctrl+C
And re-start React Native
> npm start

Open the Expo app againSelect Scan QR Code or select the Recently visited app.

Your app should now load. It may take a few minutes for the first loading to complete.

Any changes you make to your app will now be automatically reflected in your app aka hot reloading.
Open the file app.js in your app directory
C:\Dev\ReactNativeApps\dev-app-01\app.js
Note: You can use any text editor or ide, but VSCode, Netbeans, Geany, or Notepad++ are good choices.
And change the text block
<Text>Open up App.js to start working on your app!</Text>
To anything, such as
<Text>It works!</Text>

Save and the text changes should appear in your app.

Note: If the change does not appear, close the app (not minimize) and re-open it from Expo.You can also shake the phone (-sign-, why not an option in the pull down?) to show developer options and enable hot reloading, if it isn’t already.

Ctrl+C in the console to stop React Native.
Now, that was a lot of stuff,
but going forward with your next apps, it should be much simpler with just:
> create-react-native-app my-cool-app
> cd my-cool-app
> npm start

- Details
Joomla! is a free and open-source content management system (CMS) for publishing web content. It is built on a model–view–controller web application framework that can be used independently of the CMS that allows you to build powerful online applications.
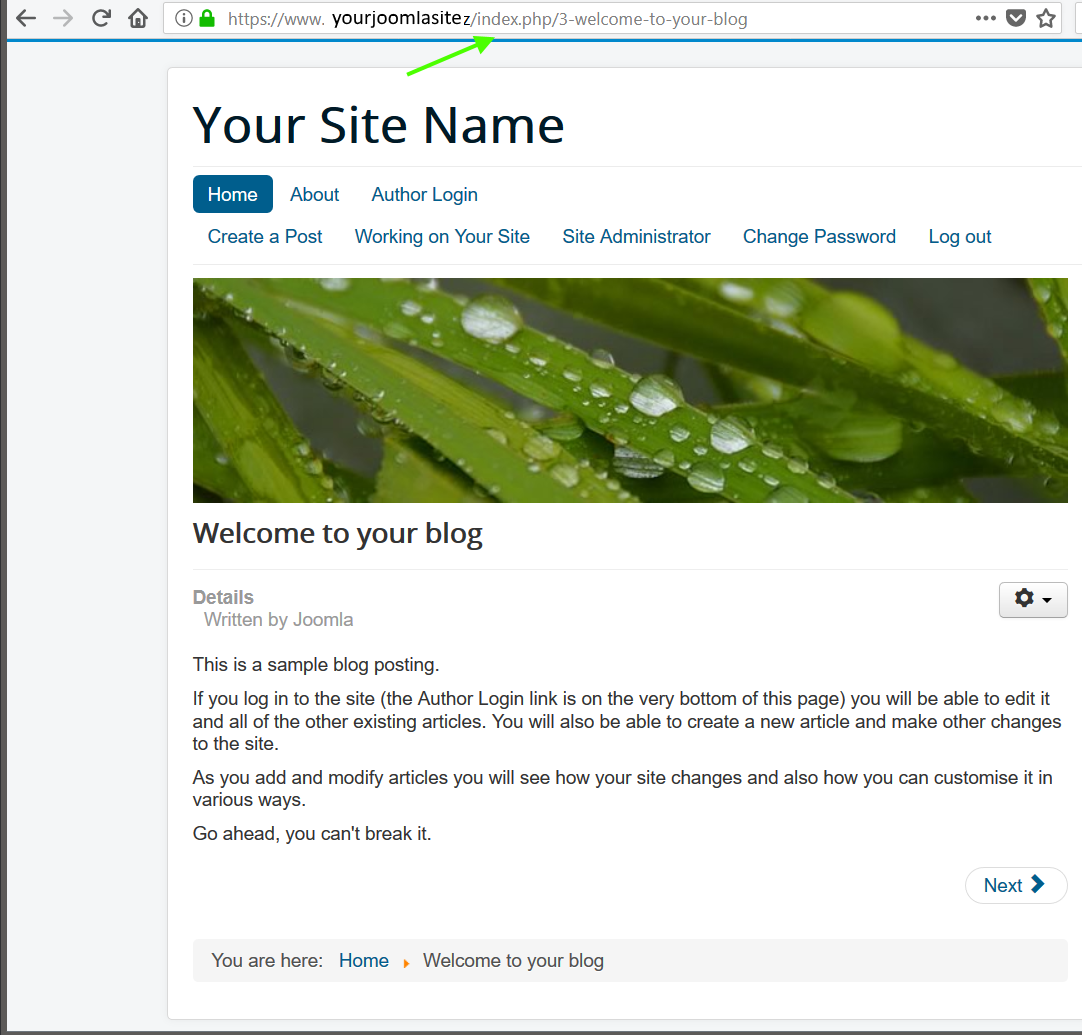
After installing Joomla you may notice your links have index.php within the url.
While functional, for Search Engine Friendly URLs, it is recommend to remove script names
To remove index.php from urls, login to the Joomla administration section
https://www.yourjoomlasite.com/administrator/
Select System
Select Global Configuration

Search Friendly URLs should already be enabled
Enable Use URL Rewriting
URL rewriting is a way of implementing URL mapping or routing within a web application. Rewritten URLs (sometimes known as short, pretty or fancy URLs, search engine friendly - SEF URLs, or slugs) are used to provide shorter and more relevant-looking links to web pages. The technique adds a layer of abstraction between the files used to generate a web page and the URL that is presented to the outside world.
Click Save

View your blog post again,
It may work, but most likely you will get a 404
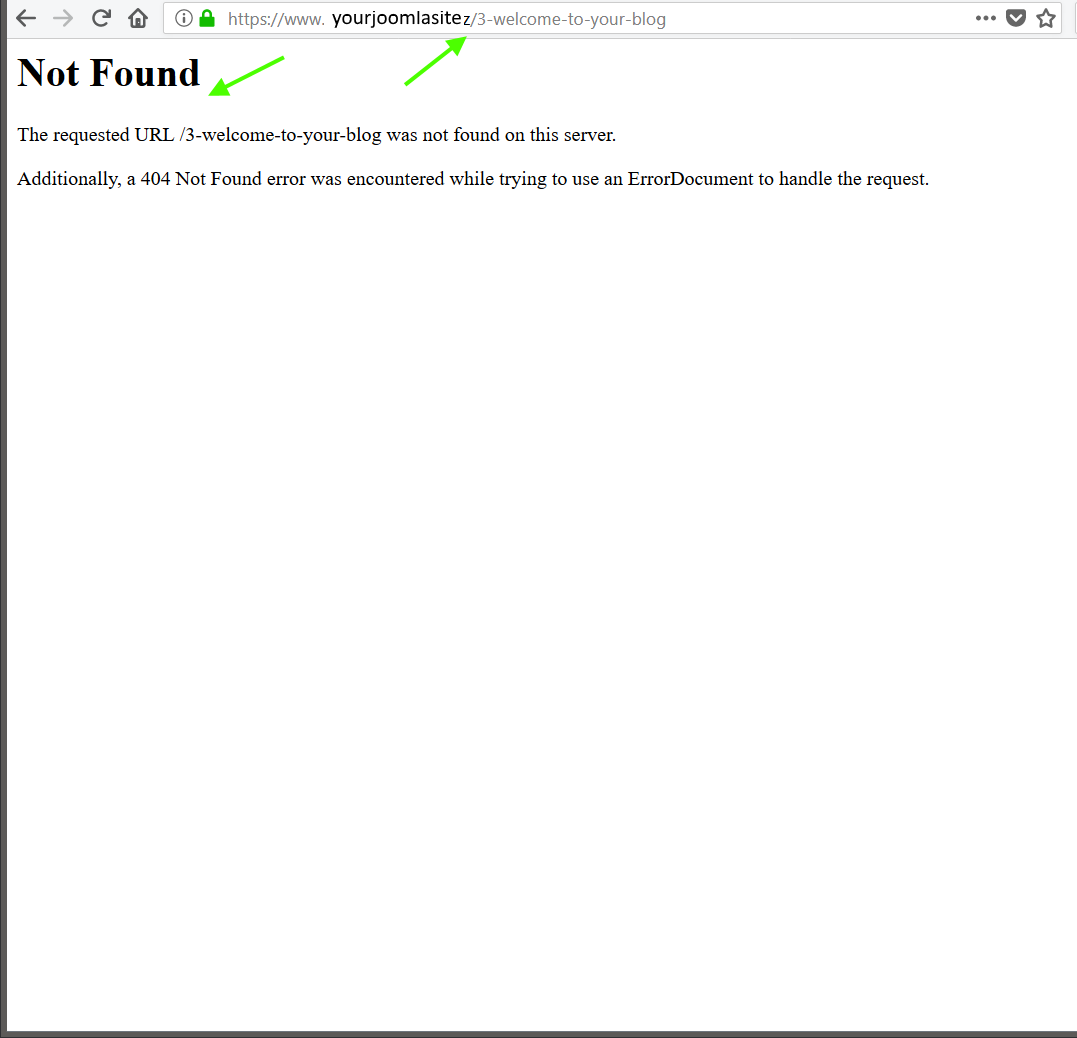
You now need to tell the web server what to URL Rewrite
If you are using Apache as your web server, conveniently, Joomla comes with rules already written, you just need to enable them.
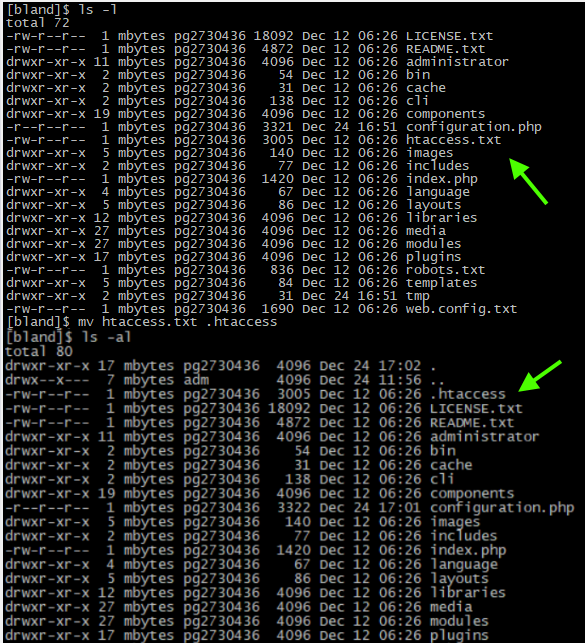
In the Joomla web directory, there should be a file named htaccess.txt
Rename that file to .htaccess
mv htaccess.txt .htaccess
In Linux,
mv moves a file to another file, thus renaming it.
ls -l shows detailed listing of fies
ls -al also show 'hidden' files starting with a dot
And now you should have Search Friendly URLs without the index.php in the url.

Here are the contents of Joomla’s .htacccess file, in case it is not in your web directory
$ cat .htaccess
##
# @package Joomla
# @copyright Copyright (C) 2005 - 2017 Open Source Matters. All rights reserved.
# @license GNU General Public License version 2 or later; see LICENSE.txt
##
##
# READ THIS COMPLETELY IF YOU CHOOSE TO USE THIS FILE!
#
# The line 'Options +FollowSymLinks' may cause problems with some server configurations.
# It is required for the use of mod_rewrite, but it may have already been set by your
# server administrator in a way that disallows changing it in this .htaccess file.
# If using it causes your site to produce an error, comment it out (add # to the
# beginning of the line), reload your site in your browser and test your sef urls. If
# they work, then it has been set by your server administrator and you do not need to
# set it here.
##
## No directory listings
<IfModule autoindex>
IndexIgnore *
</IfModule>
## Can be commented out if causes errors, see notes above.
Options +FollowSymlinks
Options -Indexes
## Mod_rewrite in use.
RewriteEngine On
## Begin - Rewrite rules to block out some common exploits.
# If you experience problems on your site then comment out the operations listed
# below by adding a # to the beginning of the line.
# This attempts to block the most common type of exploit `attempts` on Joomla!
#
# Block any script trying to base64_encode data within the URL.
RewriteCond %{QUERY_STRING} base64_encode[^(]*\([^)]*\) [OR]
# Block any script that includes a <script> tag in URL.
RewriteCond %{QUERY_STRING} (<|%3C)([^s]*s)+cript.*(>|%3E) [NC,OR]
# Block any script trying to set a PHP GLOBALS variable via URL.
RewriteCond %{QUERY_STRING} GLOBALS(=|\[|\%[0-9A-Z]{0,2}) [OR]
# Block any script trying to modify a _REQUEST variable via URL.
RewriteCond %{QUERY_STRING} _REQUEST(=|\[|\%[0-9A-Z]{0,2})
# Return 403 Forbidden header and show the content of the root home page
RewriteRule .* index.php [F]
#
## End - Rewrite rules to block out some common exploits.
## Begin - Custom redirects
#
# If you need to redirect some pages, or set a canonical non-www to
# www redirect (or vice versa), place that code here. Ensure those
# redirects use the correct RewriteRule syntax and the [R=301,L] flags.
#
## End - Custom redirects
##
# Uncomment the following line if your webserver's URL
# is not directly related to physical file paths.
# Update Your Joomla! Directory (just / for root).
##
# RewriteBase /
## Begin - Joomla! core SEF Section.
#
RewriteRule .* - [E=HTTP_AUTHORIZATION:%{HTTP:Authorization}]
#
# If the requested path and file is not /index.php and the request
# has not already been internally rewritten to the index.php script
RewriteCond %{REQUEST_URI} !^/index\.php
# and the requested path and file doesn't directly match a physical file
RewriteCond %{REQUEST_FILENAME} !-f
# and the requested path and file doesn't directly match a physical folder
RewriteCond %{REQUEST_FILENAME} !-d
# internally rewrite the request to the index.php script
RewriteRule .* index.php [L]
#
## End - Joomla! core SEF Section.
If you are using Nginx for your web server, instead of using the .htaccess file, you will need to edit your Nginx configuration
Add the next code to your server (vhost) configuration in the nginx.conf file:
# Support Clean (aka Search Engine Friendly) URLs
location / {
try_files $uri $uri/ /index.php?$args;
}
If the above does not work, add the next code to your server configuration in the nginx.conf file
server {
....
location / {
expires 1d;
# Enable joomla SEF URL's inside Nginx
try_files $uri $uri/ /index.php?$args;
}
....
}
Joomla Docs - Enabling Search Engine Friendly (SEF) URLs on Nginx
End of document. Thanks for reading.
- Details
Node.js is a JavaScript runtime which uses an event-driven, non-blocking I/O model.
Node.js can be an alternative to Java, PHP, .Net, Python, etc to develop web sites and applications using best convention frameworks such as Express.js, desktop applications using Electron.js, mobile apps using Ionic.js or React Native, to name a few of the possibilities.
Node.js is often referenced as just Node, but for easier internet searching, it is best to stick with nodejs.
Note: Node.js can be installed on multiple platforms, but if you are going to use Node.js to develop mobile apps and you want to be able to use an hardware emulator to test your development, you will need to install Node.js in your Host computer, and not a Guest VM.
To install Node.js in Windows 10
Go to https://nodejs.org

You can either download the LTS (long term support) version or the current version. Normally you would think to grab the latest, but for Node.js, it is better to use the LTS version.
Click the LTS button and download Node.js.
If you click on the LTS schedule, you will see how long Node.js intends to support both versions.

As you can see, the Current version will no be supported for as long. Node.js is following the pattern of even releases are for production while odd releases are for development. Also, some Node.js frameworks, such as Ionic.js, do not work well with the Current version, due to library dependencies. It is best to use the LTS version unless you find a particular need for the Current.
Double click the Node.js version you downloaded (node-v8.9.3-x64.msi) to begin installation.
Click Next

The normal agree to everything which you will never read but it is required to install any software.
Click Next

Choose a installation directory
The default is C:\Program Files\nodejs

For development, it can be better to keep your tools under a common directory, such as C:\Dev\. Doing so facilitates backups, deletions, you will have less typing to get to a directory, etc
Click Change and select your installation location
Click Next

By default all the options are enabled, leave them so.
- npm is a package manager for Node.js and other software; it is the common method of installing Node.js related frameworks and libraries.
- Add to Path is import as you will need to use the command line at times with Node.js
Click Next

Actually start the installation
Click install

And your done installing.
Click Finish

To verify that Node.js was installed, open a command prompt
Start -> Run -> type cmd and press enter
Instead of the Windows command prompt, you may want to use ConsoleZ which gives you more developer friendly options, such as easier copy/paste, tabs, etc
Change the directory to where you installed Node.js
cd C:\Program Files\nodejs
or
cd C:\Dev\nodejs
Verify the version of Node.js
node -v
The output should be the same you installed
You can also check the version of npm
npm -v
To update npm and other Node.js libraries you will install,
npm update
There will probably be an update to npm at least

You now have Node.js installed.
Your on your way to developing with frameworks such as Express.js, desktop applications using Electron.js, mobile apps using Ionic.js or React Native, to name a few of the possibilities.
End of document. Thanks for reading.