To enable the full functionality of VirtualBox, you often have to install Guest Additions, which enable features such as shared drives and better video support, such as being able to auto size the Guest VM display to the current dimensions of the VirtualBox gui, or to view the Guest VM in full screen.
“Guest Additions are designed to be installed inside a virtual machine after the guest operating system has been installed. They consist of device drivers and system applications that optimize the guest operating system for better performance and usability.”
When you upgrade the OS within a Guest VM, it’s kernel may change requiring you to re-install Guest Additions. You will know the Guest Additions need to be re-installed when basic features such as viewing the Guest VM in full screen no longer work.
VirtualBox is a cross-platform virtualization software, which allows you to run another Operating System (such as Ubuntu) from your current Operation System (such as Windows). Using VirtualBox, you can try out, play with, test, or develop with other Operating Systems without having to reinstall your computer or potentially more complicated try to multi boot your computer.
In virtualization software terms, your computer is called the Host, while the other Operating Systems, or OSs for short, you install through the virtualization software, VirtualBox, are called Guests. Guests are often called Virtual Machines, or Guest VMs, or VMs for short. You can install as many Virtual Machines as you want. So you can try Ubuntu, Mint Linux, Windows Insider, Windows Server, Mac OSX, etc all from within your current Windows or Linux Host. The Virtual Machines are also self contained within one folder so you can backup or transfer the Virtual Machine to another computer. Thus you have a portable Operating System; of course, with the requirement of installing VirtualBox on the other Host computer.
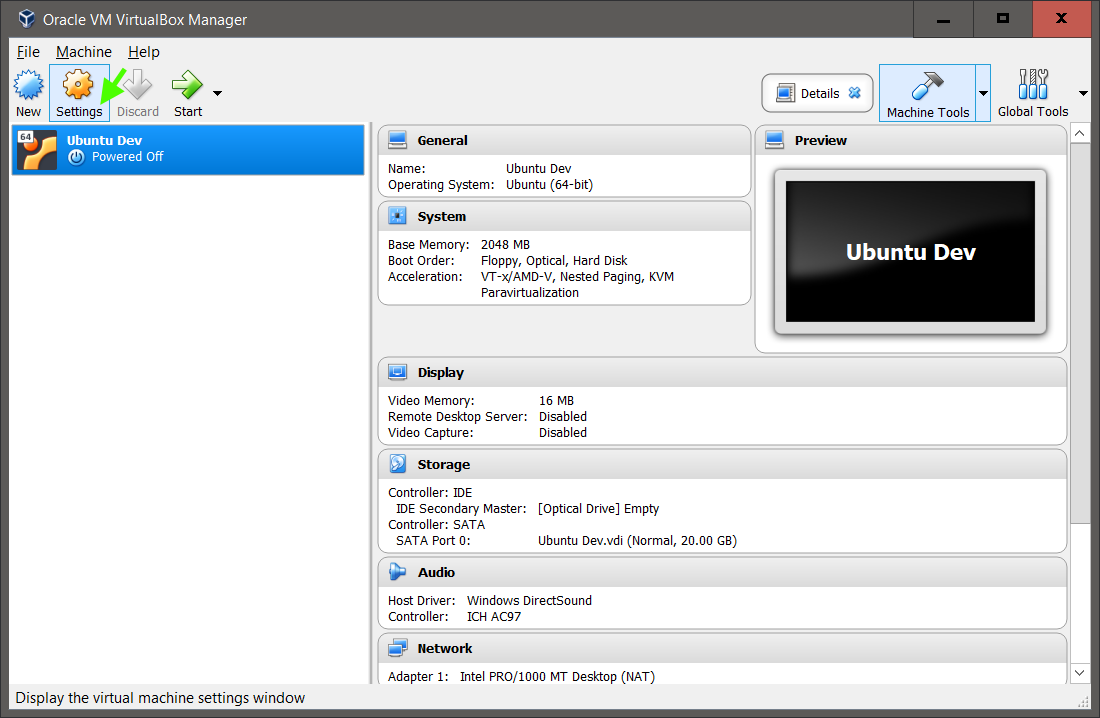
The Settings option allows you to further customize and adjust the hardware requirements of the VM
Some Settings you may want to change for most VMs follows:
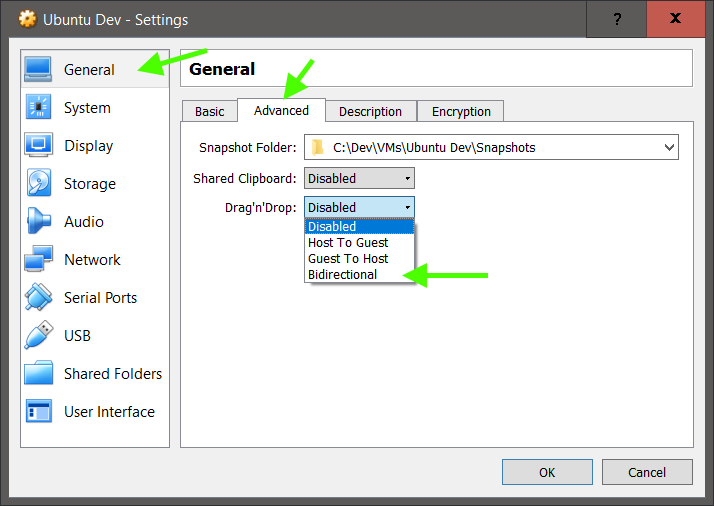
General -> Advanced
Enable Bidirectional Shared Clipboard and Bidirectional Drag’n’Drop
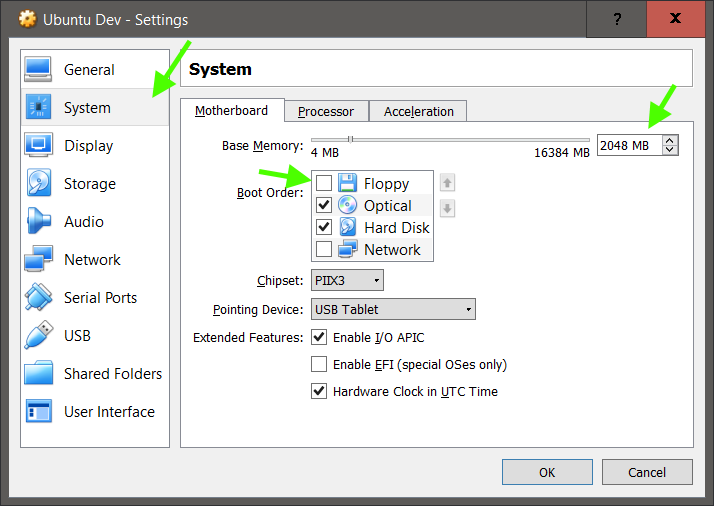
System -> Motherboard
You can adjust the memory allocation
Uncheck the Floppy from Boot Order, as it's not needed for modern OSs in VMs
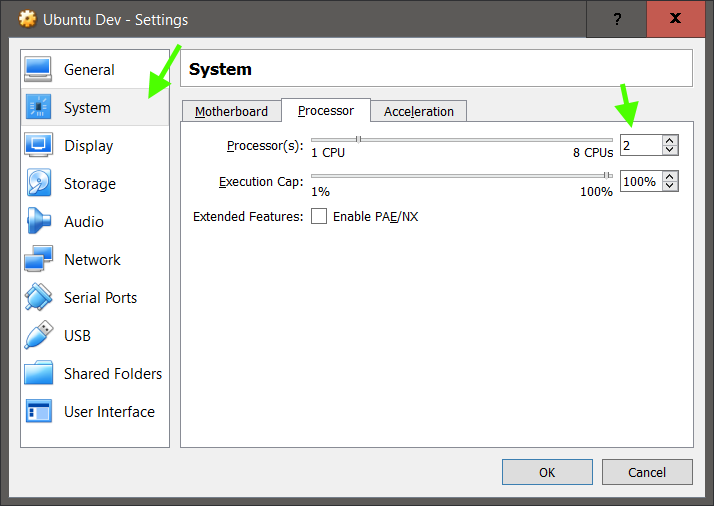
System -> Processor
You can adjust the processor usage of the VM. If you have 4 or cores on your CPU, you can allocate some of them to the VM. 2 cpus allows some multitasking to occur.
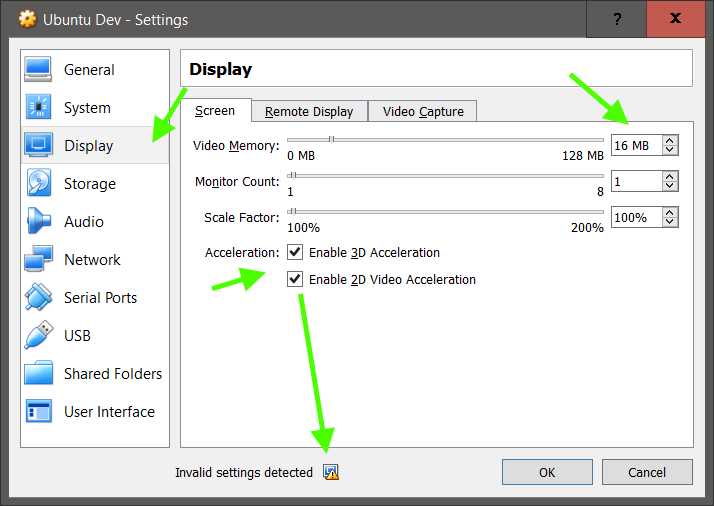
Display -> Screen
You can enable 3D and 2D acceleration. Support will vary based on your Host computer and the Guest VM. Linux VMs do not support 2D acceleration, but don’t worry, they will still work smoothly. Also, similar to System Memory, do not over allocate video memory as that can negatively impact your Host computer.
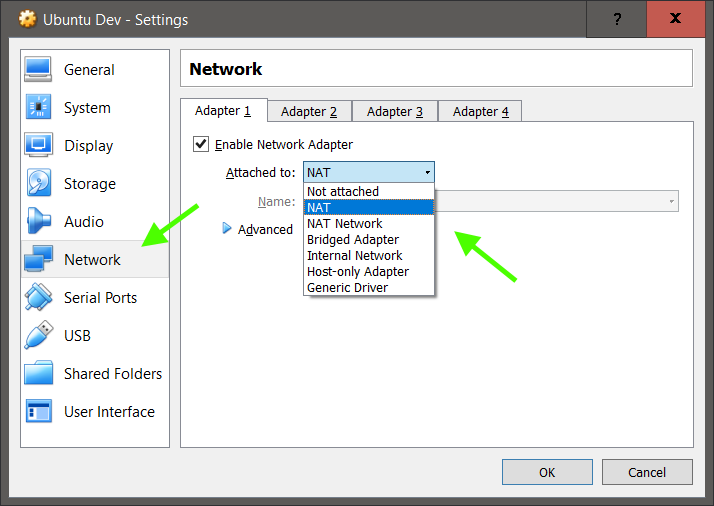
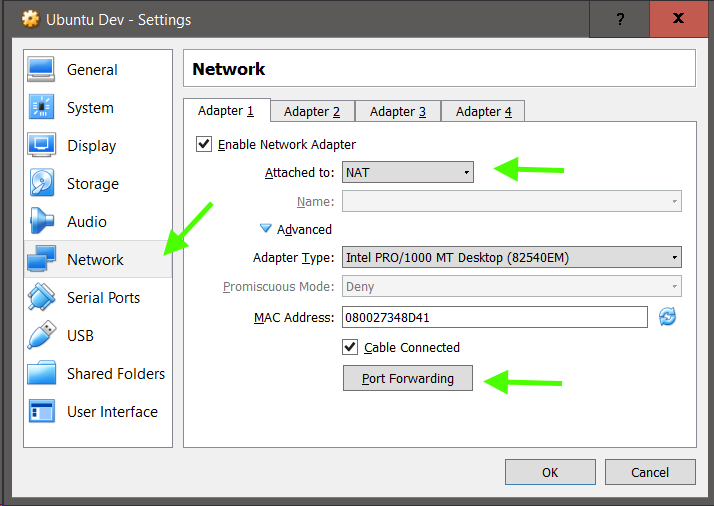
The default of NAT is fine. This allows the VM to use your Host computer network for internet access, but the VM does not get it’s own IP address. Another option is Bridged Adapter which will make the VM request it’s own IP address, and thus show up on your network.
While both options should work, depending on your Host computer, one or neither option may work without searching the internet for a solution, unfortunately.
Search Bing or Google for current Virtual Box networking issues.
Network -> Adapter -> NAT -> Advance
NAT (Network Address Translation)
As the VM will not have it’s own IP address, you can set up port forwarding to access the VM Web and other servers. However, you will need the Host IP address and the VM IP address, which requires the VM to have been installed and run once.
NAT Network is a new NAT implementation for VirtualBox which you can try if NAT doesn’t work ie no internet access from the VM. You can also try different Adapter Types, though the defaults should be ok.
Network -> Adapter -> Bridged Adapter -> Advance
Bridged Adapter effectively creates a new network interface in software, thus allowing the VM to have it’s own IP address, which can facilitate the access of the VM Web and other servers.
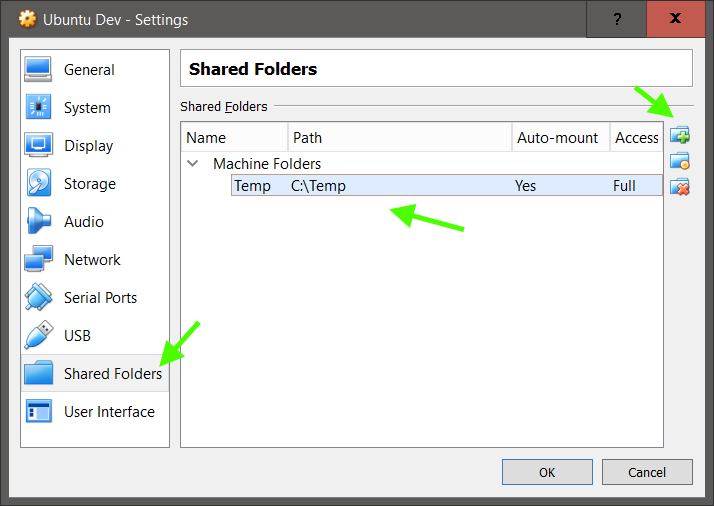
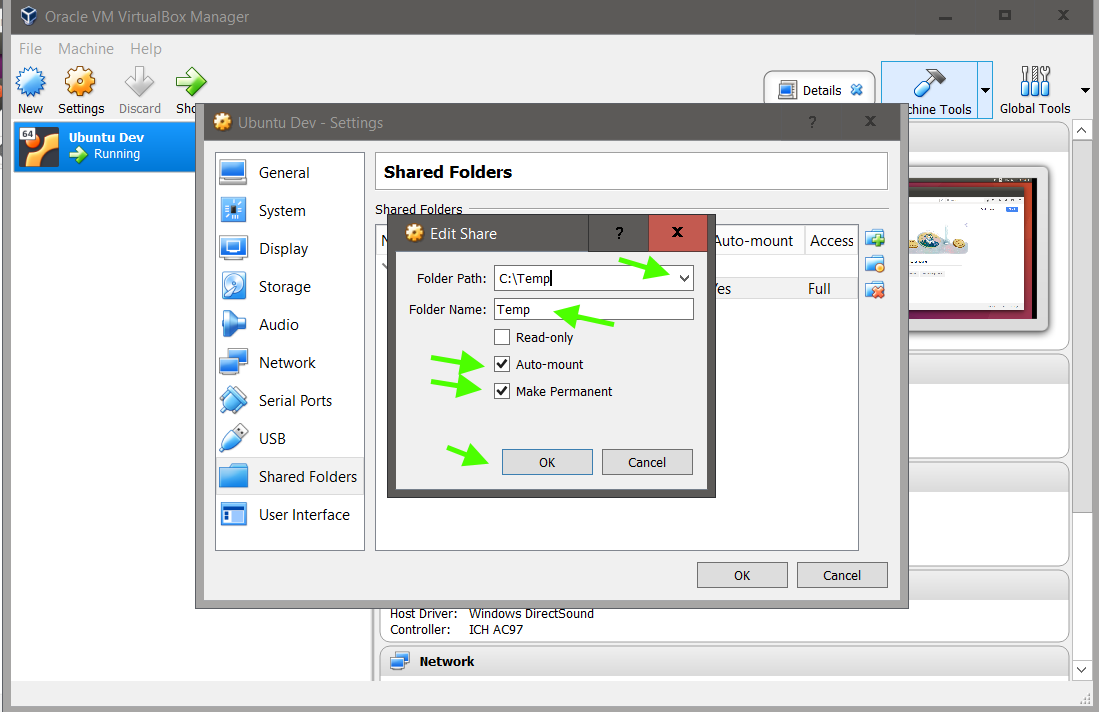
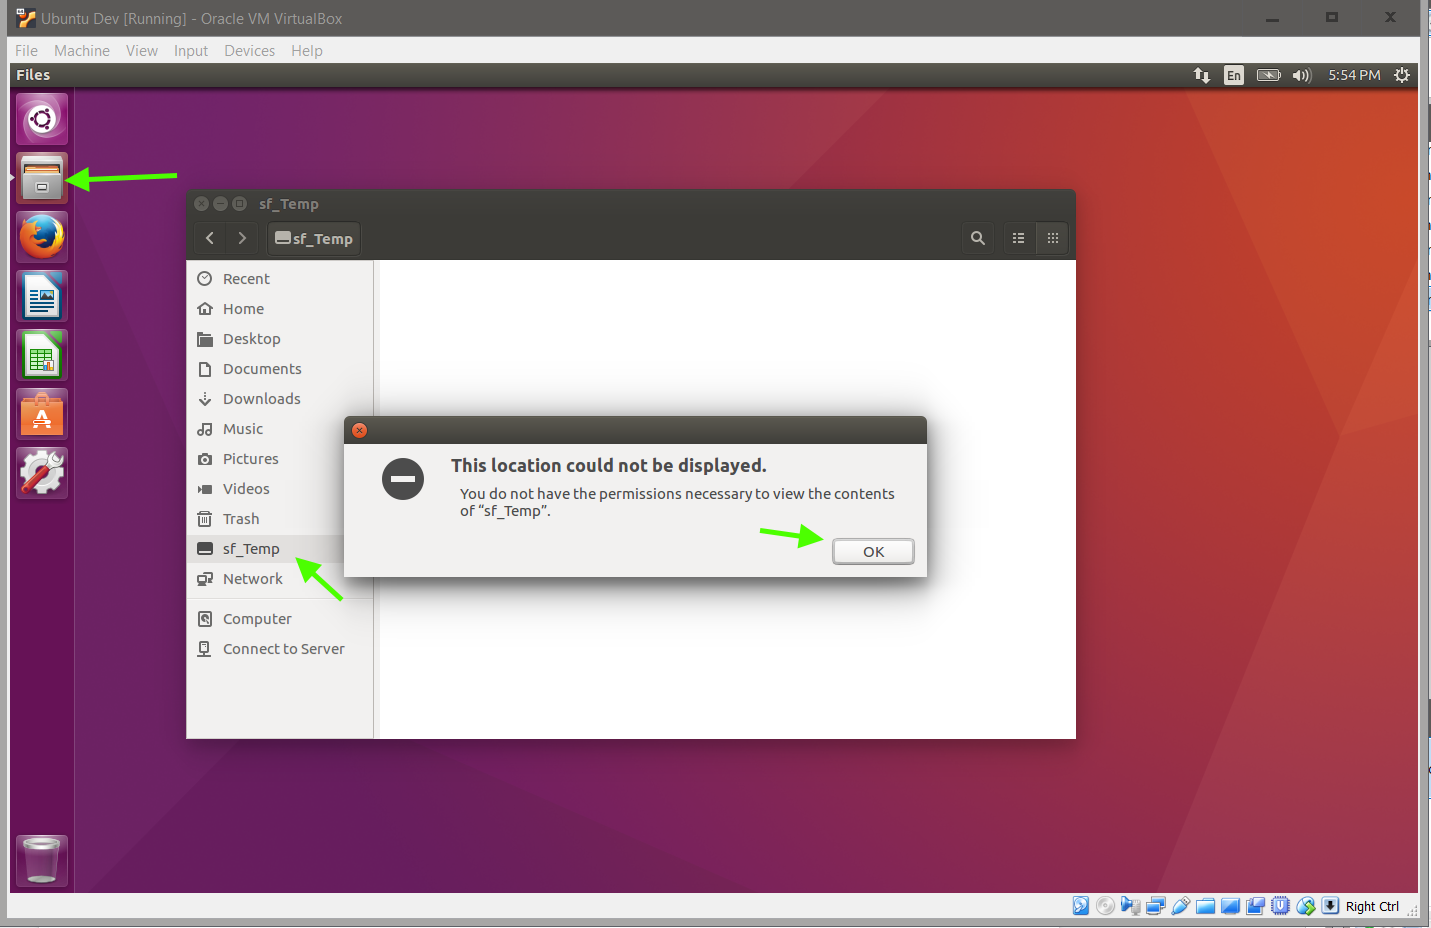
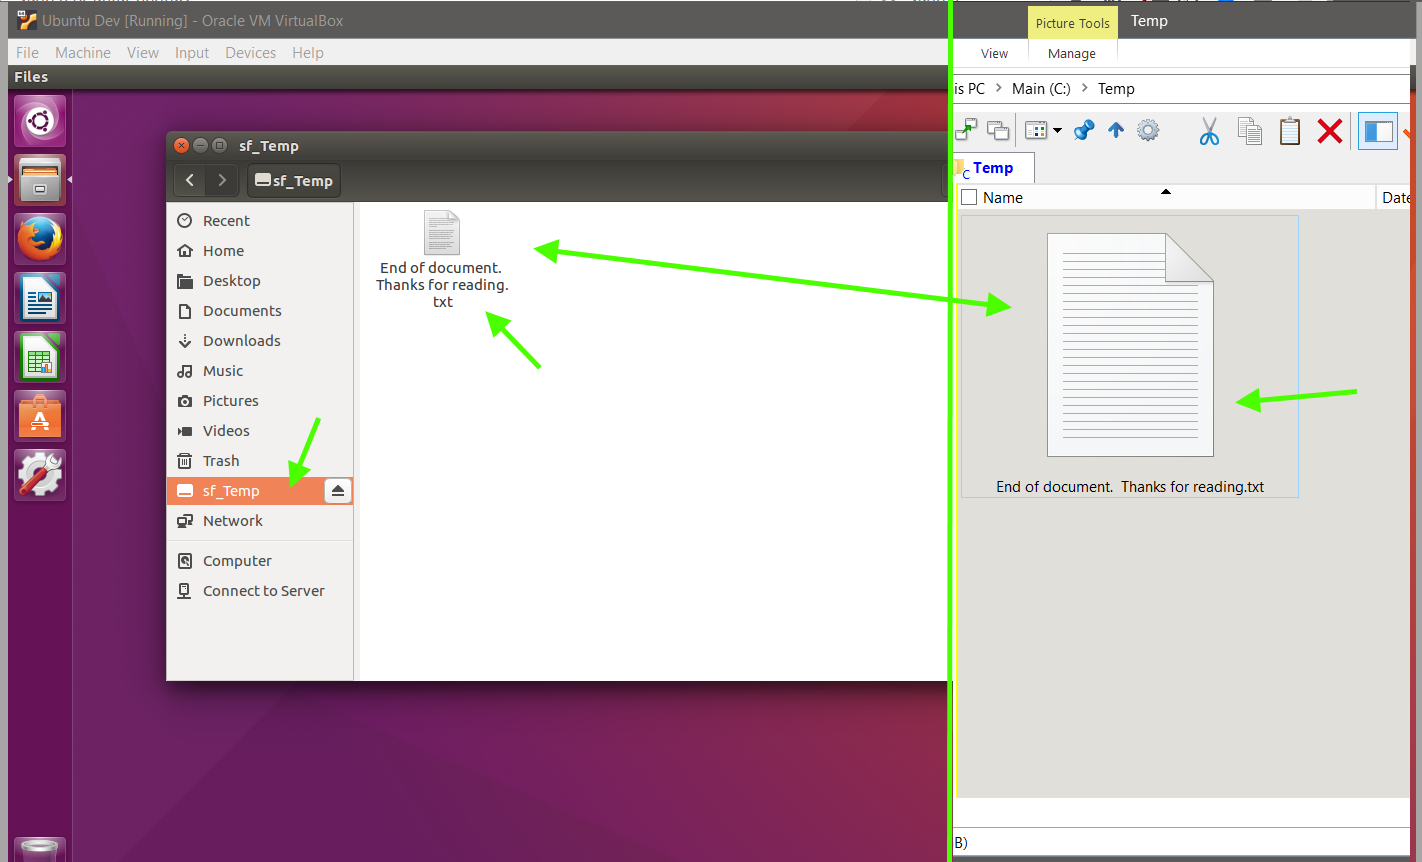
Shared Folders -> Add a folder
Adda shared folder to facilitate copying files between the Guest VM and the Host computer.
VirtualBox is a cross-platform virtualization software, which allows you to run another Operating System (such as Ubuntu) from your current Operation System (such as Windows). Using VirtualBox, you can try out, play with, test, or develop with other Operating Systems without having to reinstall your computer or potentially more complicated try to multi boot your computer.
In virtualization software terms, your computer is called the Host, while the other Operating Systems, or OSs for short, you install through the virtualization software, VirtualBox, are called Guests. Guests are often called Virtual Machines, or Guest VMs, or VMs for short. You can install as many Virtual Machines as you want. So you can try Ubuntu, Mint Linux, Windows Insider, Windows Server, Mac OSX, etc all from within your current Windows or Linux Host. The Virtual Machines are also self contained within one folder so you can backup or transfer the Virtual Machine to another computer. Thus you have a portable Operating System; of course, with the requirement of installing VirtualBox on the other Host computer.
The following steps will show you how to install a Ubuntu Virtual Machine, aka VM.
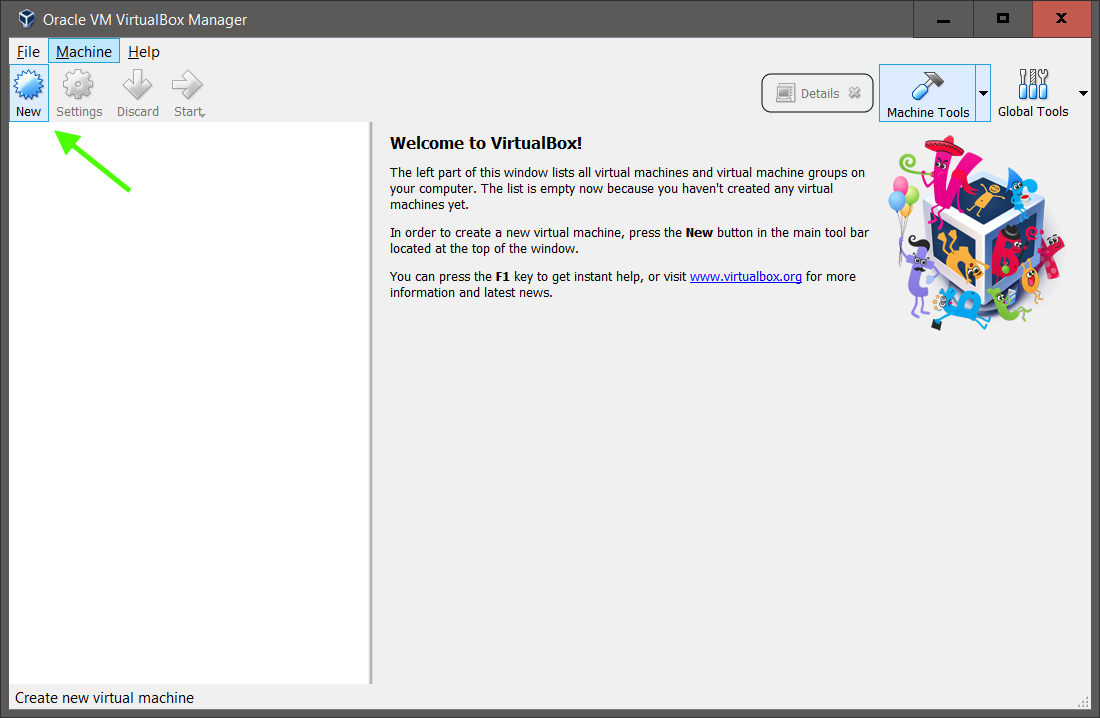
Launch VirtualBox Click the New button from the toolbar to create a new VM.
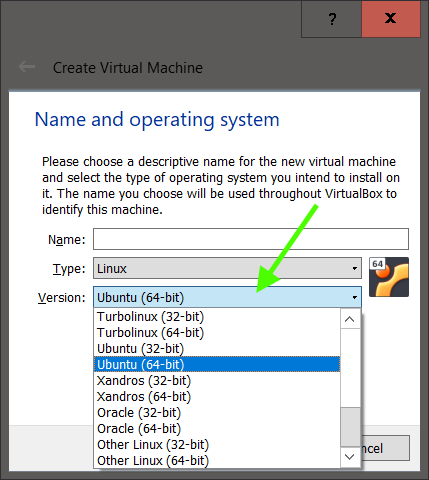
As this guide is to install Ubuntu, choose Linux as the Operating System
Ubuntu is already selected as the Version, but there are multiple Linux versions supported plus Other Linux for any other version aka flavor of Linux. Note: While you can install a Windows VM from a Windows Host, you will need a separate product key for each Windows VM to use the Windows VM past the evaluation period.
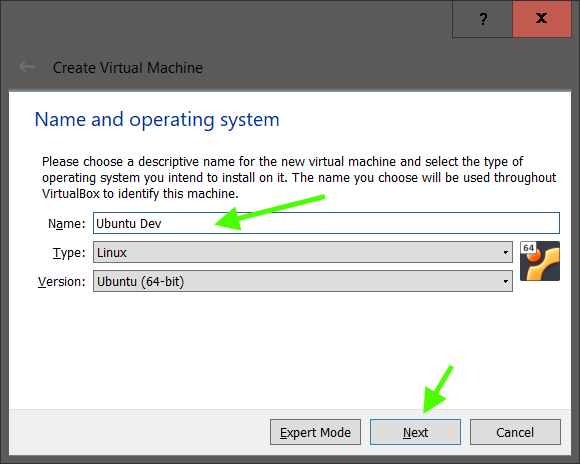
Give the VM an appropriate name. You can always rename the VM later, but the initial name will set the folder name the VM is stored under.
Expert Mode shows all the screens at once while Guided splits the screens into multiple steps. Click Next
Choose an amount of memory to be reserved for the VM from the Host. Most OSs can run ok with 2048MB aka 2GB of memory. If you have more memory and this is the only VM you will run at a time, you can allocate more memory. But the memory allocated to the VM will no longer be available to the Host. Usually leaving more memory for the Host will keep your computer running smoothly.
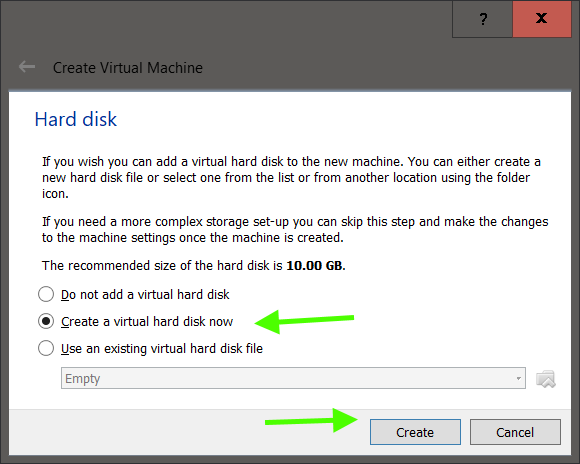
Next create a virtual hard disk for the VM. The default of 10GB is often enough, but you can adjust the size later.
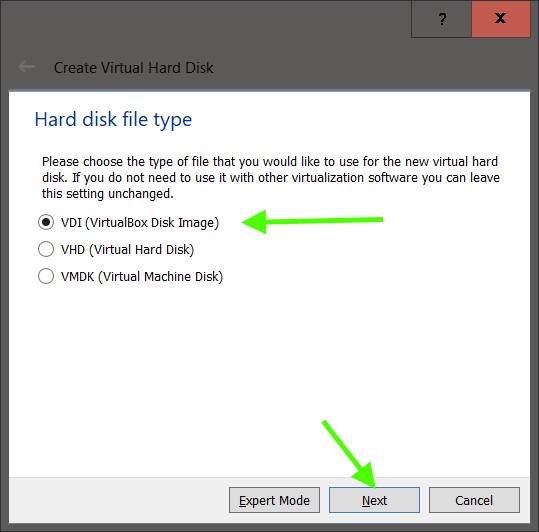
Choose the hard disk file type. Keeping the default VDI is fine.
VDI is the native format of VirtualBox
VMDK is developed by and for VMWare, but other virtualization software also support it
VHD is the native format of Microsoft Virtual PC
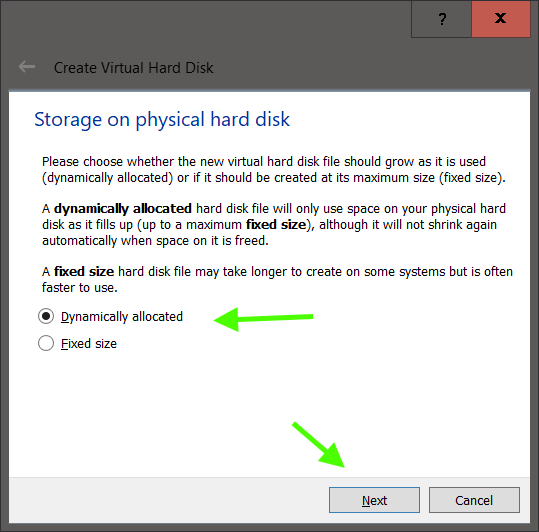
Choose how the storage is allocated. Keeping the default Dynamically allocated is fine, which will conserve disk space.
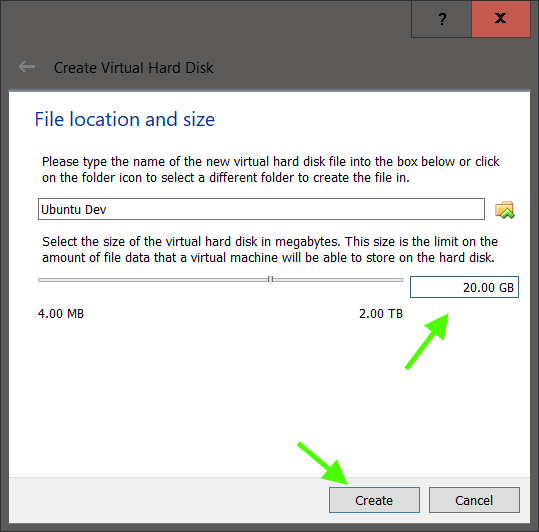
Verify the location to store the VM and disk space to allocate.
Change the default of 10GB to 20GB as OSs may use about 4GB to 6GB diskspace
Your VM is now configured. At this point, the VM is in a similar state as installing or reinstalling a computer. You need to acquire an OS installation iso to to install in the VM before you can run the OS, in this guide, Ubuntu.
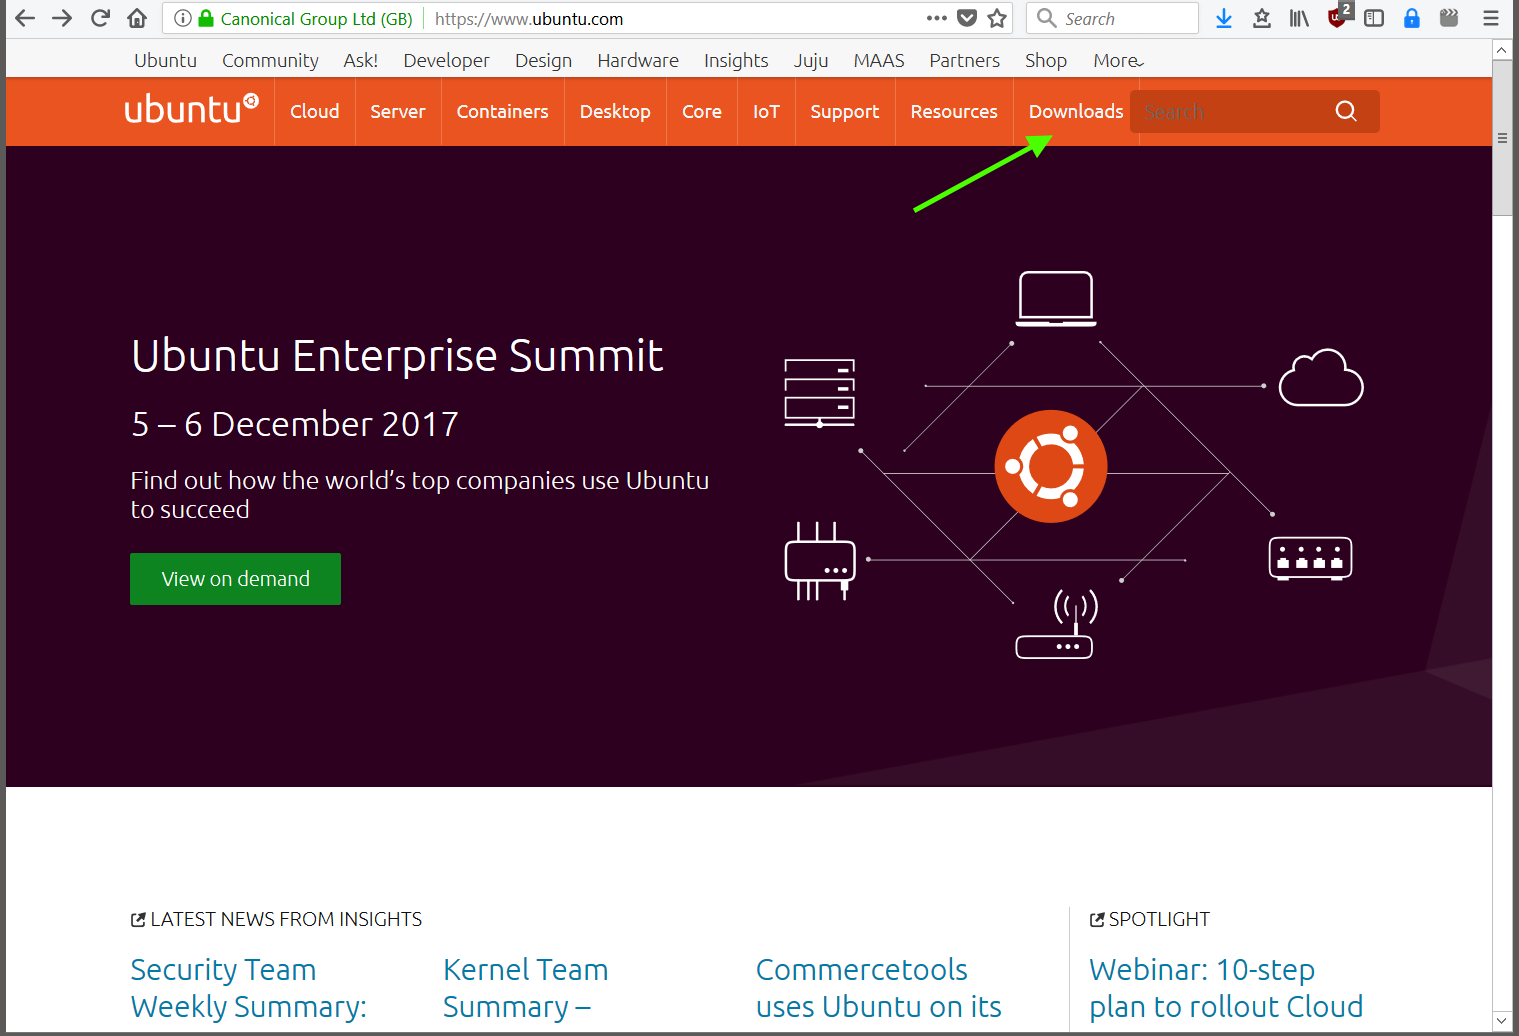
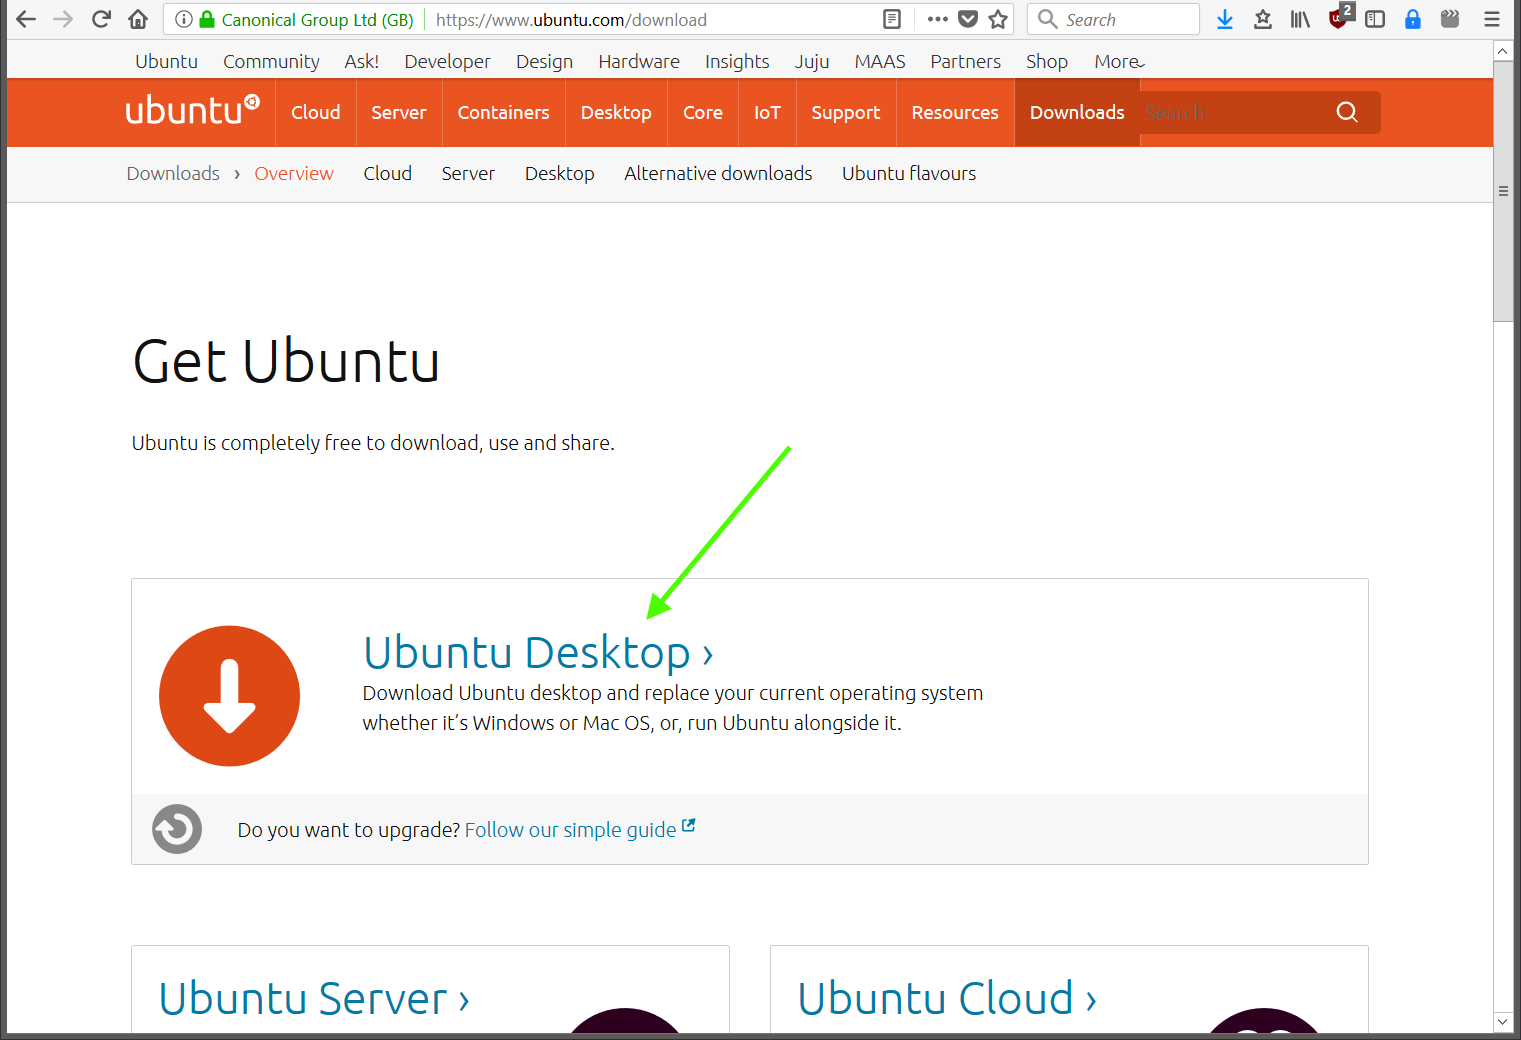
You may want to review and change some of the Settings, which will be covered in another Post. To acquire the OS installation iso for the VM, go to Ubuntu’s website at https://www.ubuntu.com/
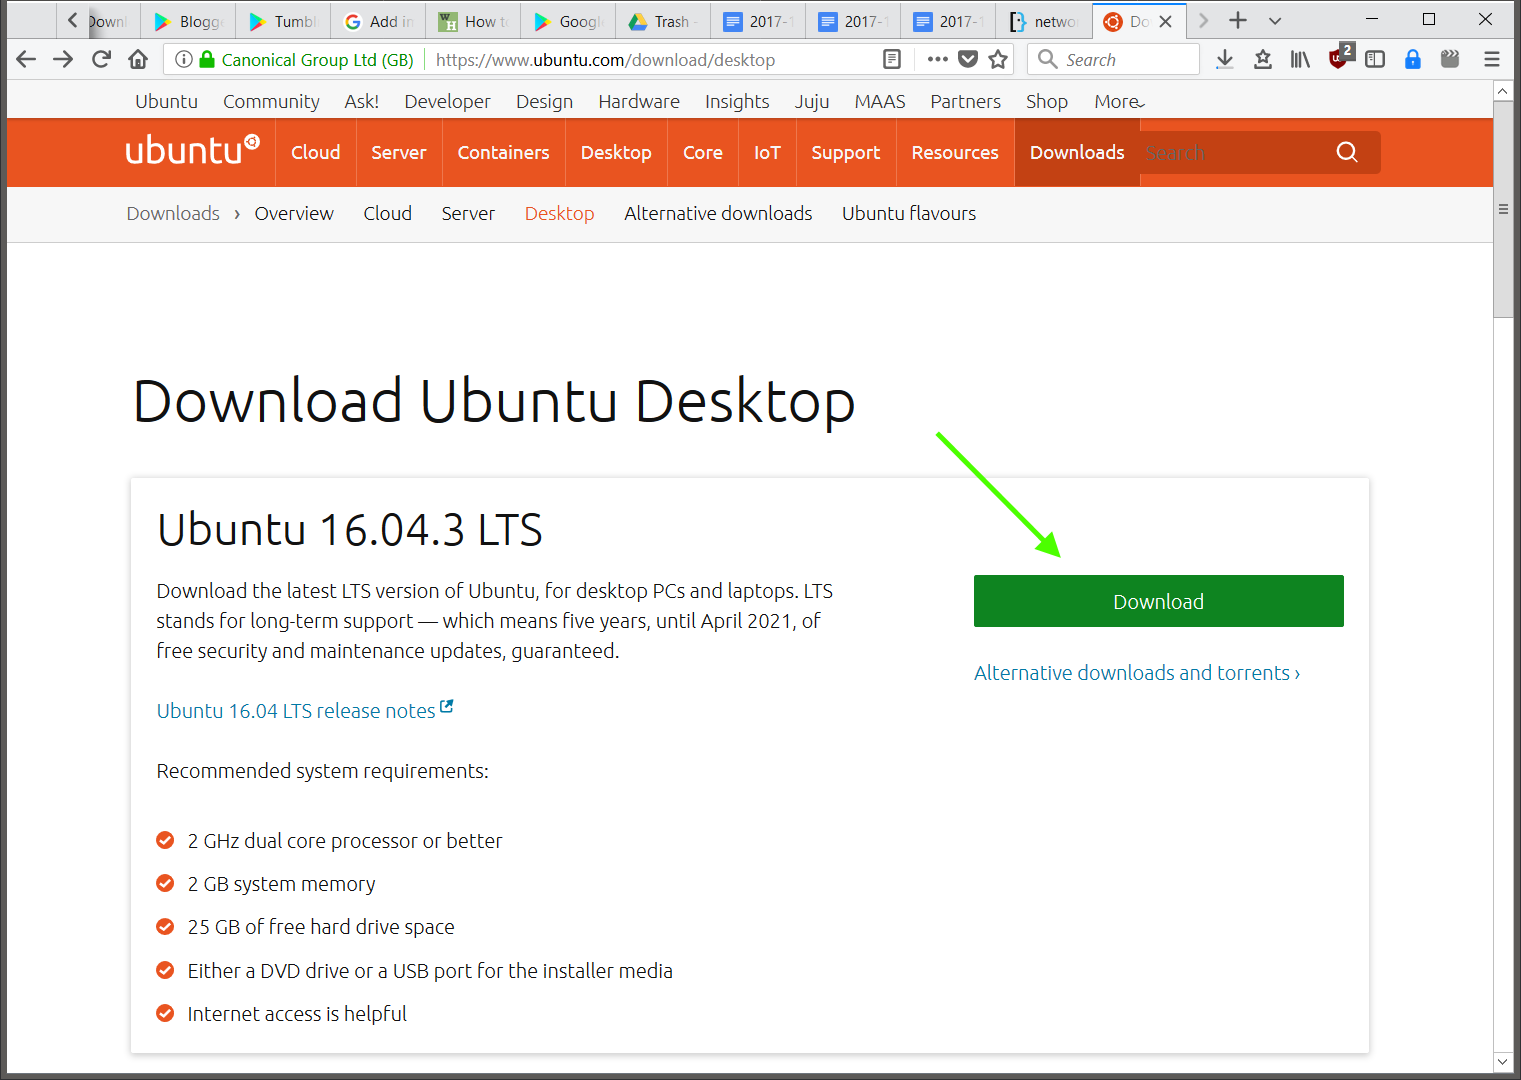
And finally click the Download button to get the installation iso.
Depending on Ubuntu’s file servers, it may take a while, but you should end up with a file similar to ubuntu-16.04.3-desktop-amd64.iso
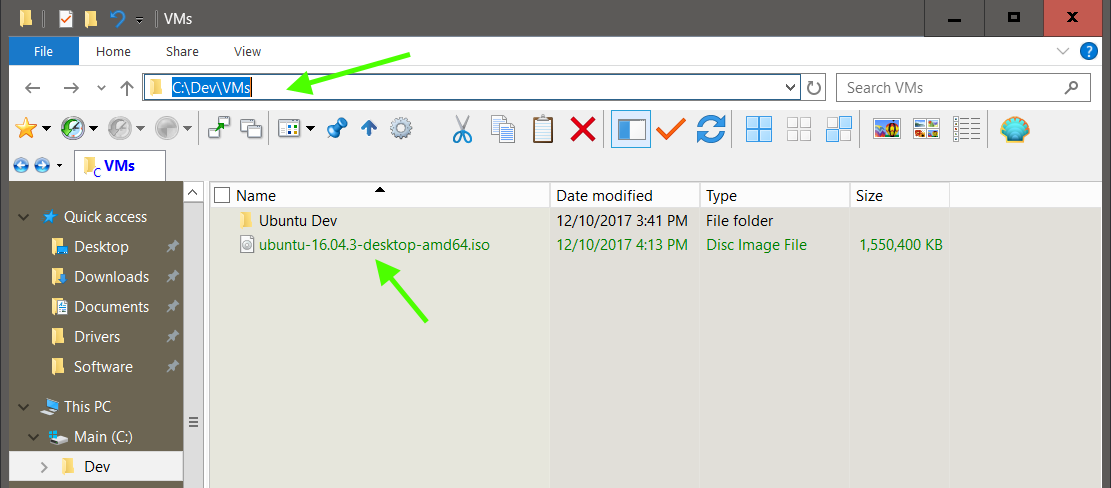
While you can use the installation iso from any location, to stay organize, and allow reuse, move the iso to where you are creating your VMs, which may be at the default C:\Users\[your username]\VirtualBox VMs Or a suggested location from the guide How to Install VirtualBox C:\Users\[your username]\Documents\, C:\VMs, or C:\Dev\VMs
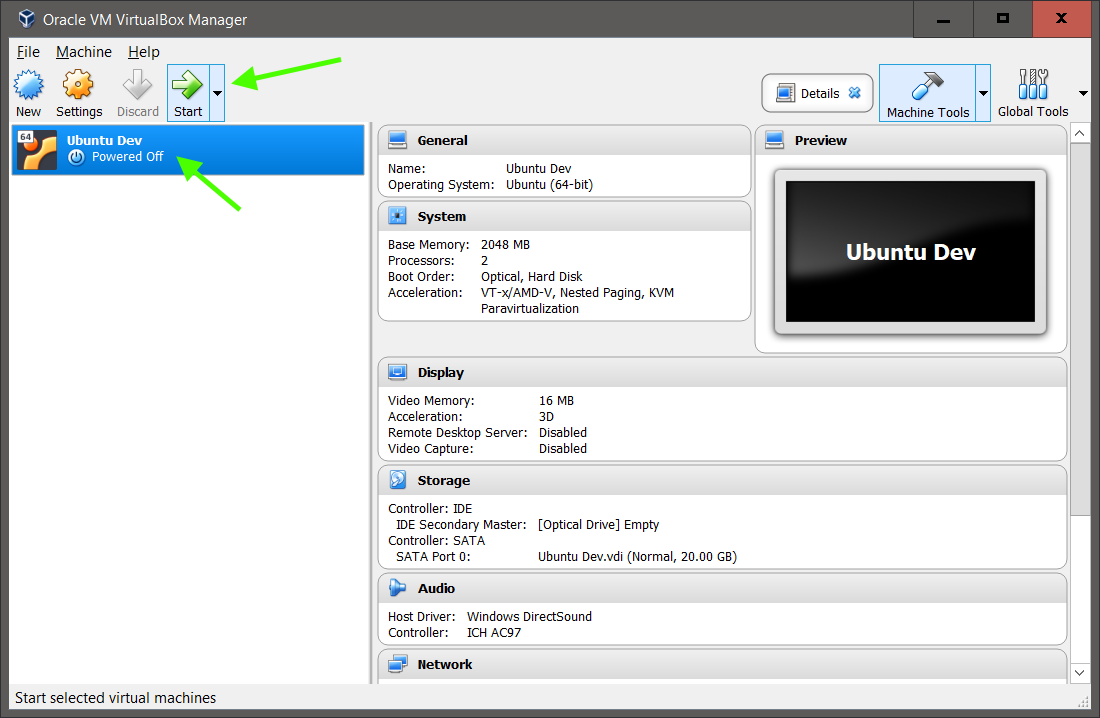
You are now ready to start your VM and install Ubuntu on it.
With the target VM selected, Click Start
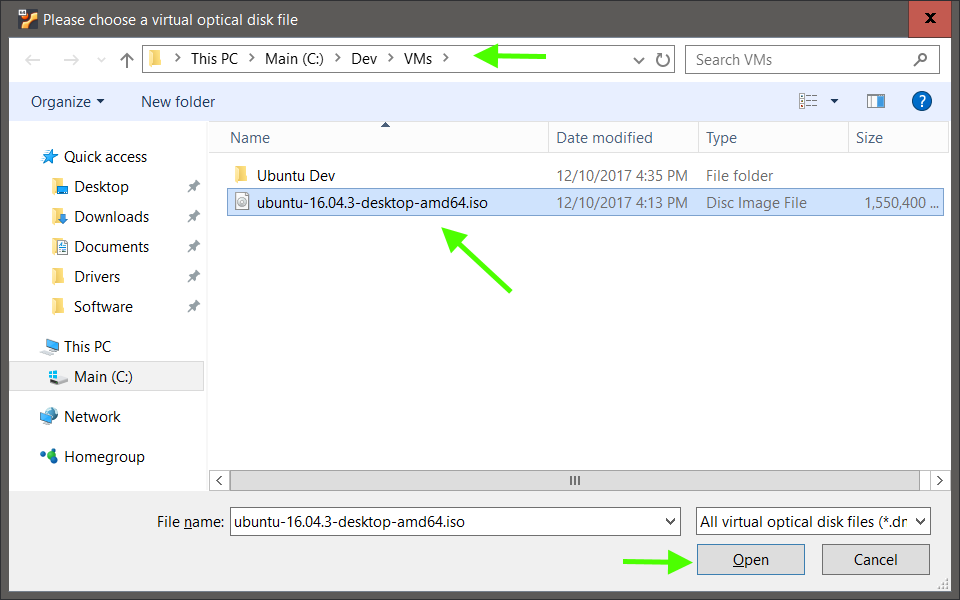
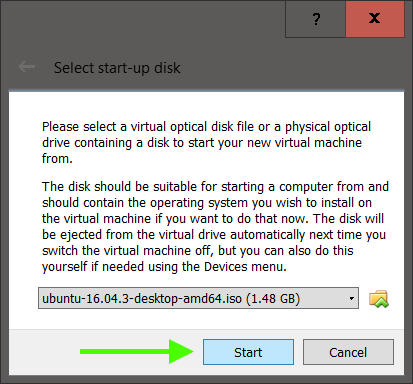
Since the VM does not have a OS installed, you will be prompted to choose a start up disk.
Select the installation iso you downloaded, ubuntu-16.04.3-desktop-amd64.iso
Click Start
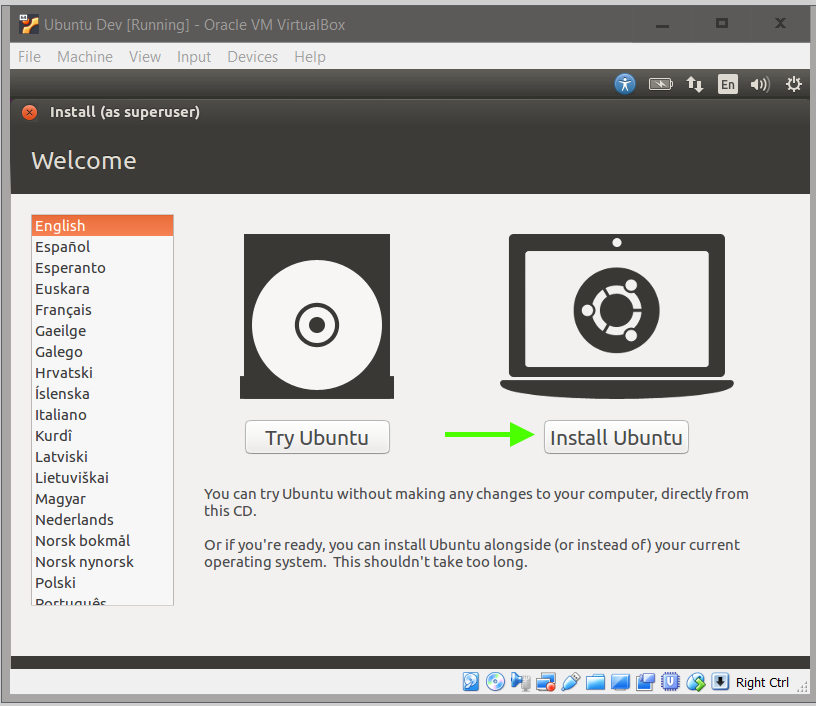
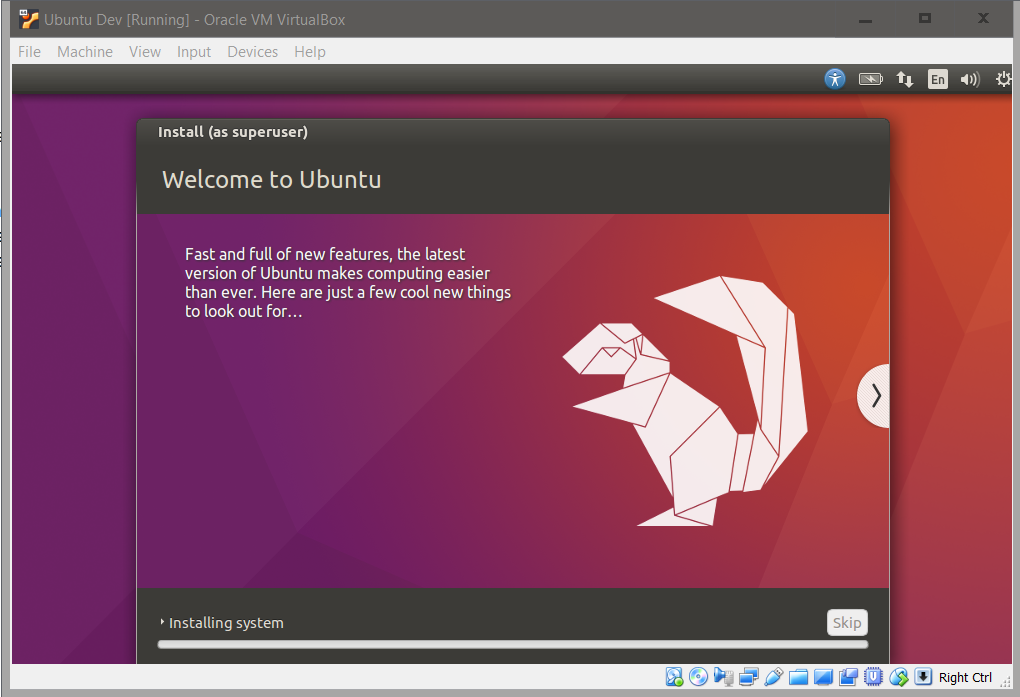
You are now installing Ubuntu in a VM, which is similar to how you would install on physical hardware, such as your computer.
The following are the current Ubuntu installation wizard screenshots. The defaults should be fine, but adjust as needed.
Choose Install
Download updates and install 3rd party packages can make the installation longer but may make the installation smoother.
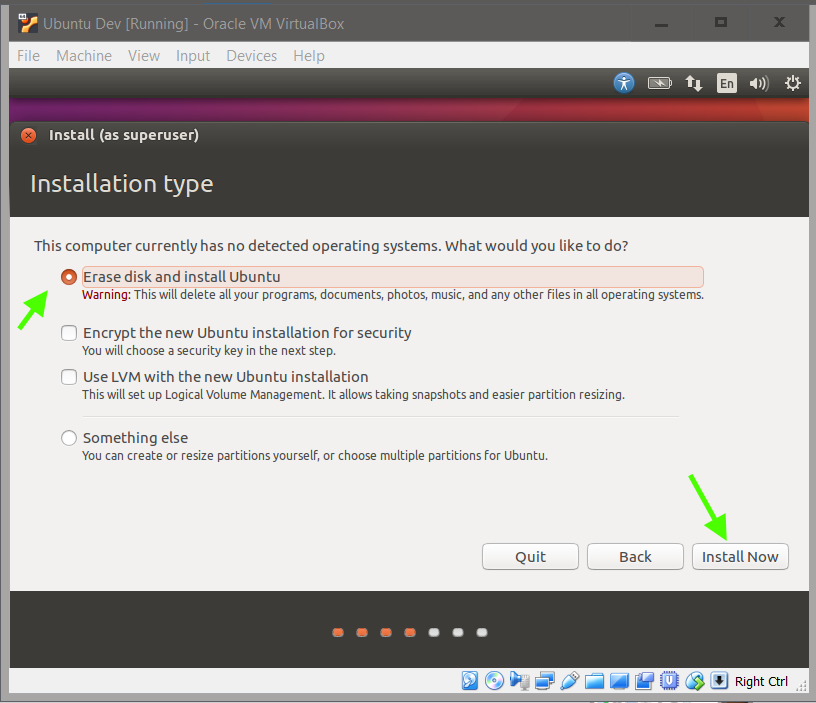
Prepare the hard drive. Erasing the disk sounds scary, but remember this is all happening in the VM, not your computer disk.
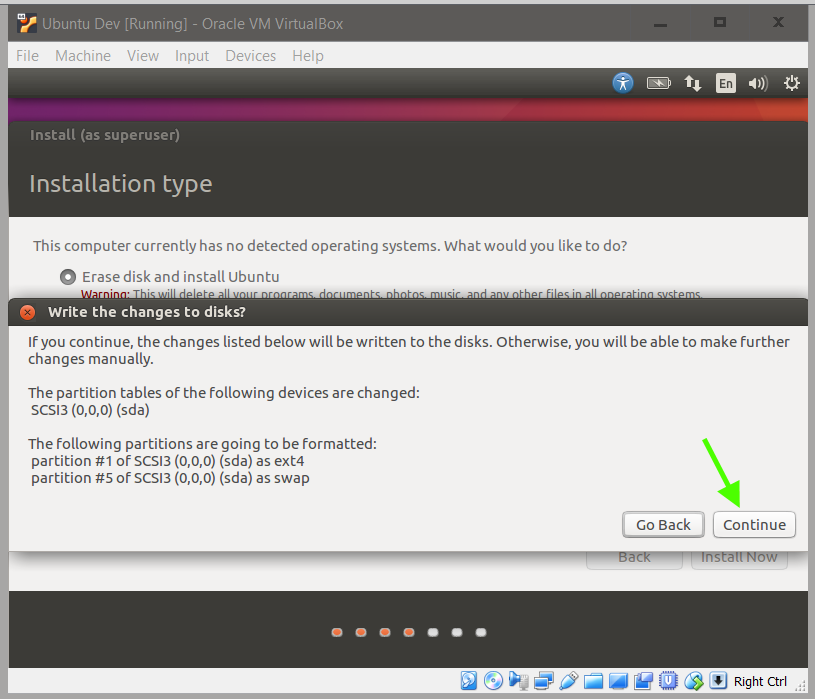
Verify the disk options
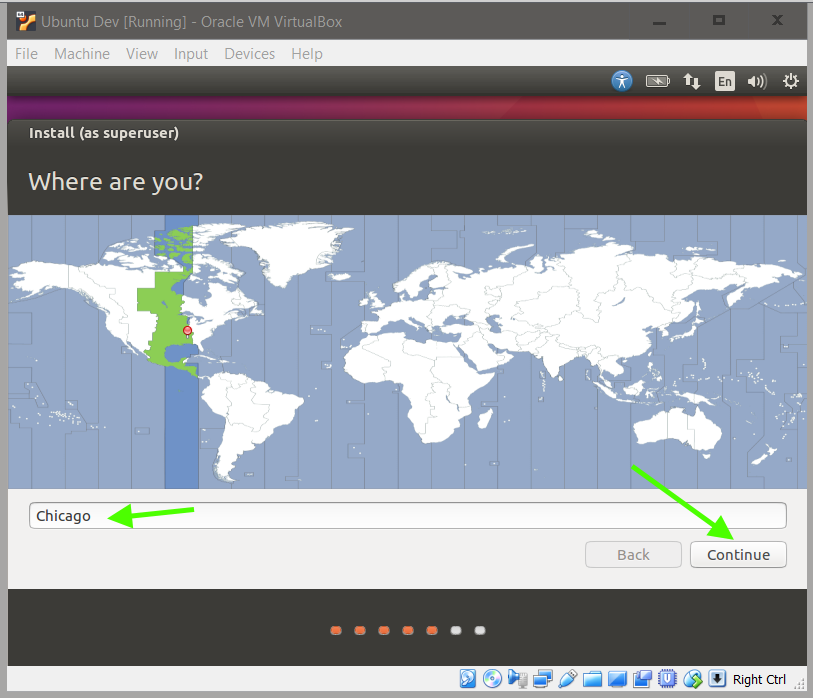
Choose your timezone
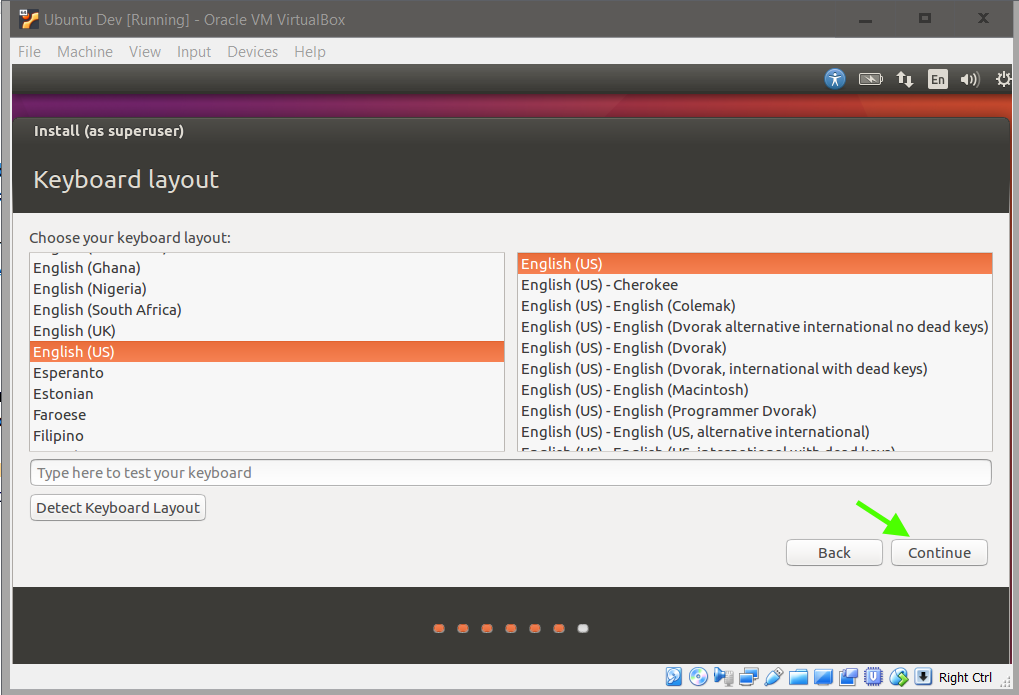
Choose your keyboard layout
Set up a user. While you can use anything, for testing or trying out an OS, it may be easier to use something simple; something that requires less typing and is easy to remember. If you are using something that should be secure, use KeePass or a more complex password.
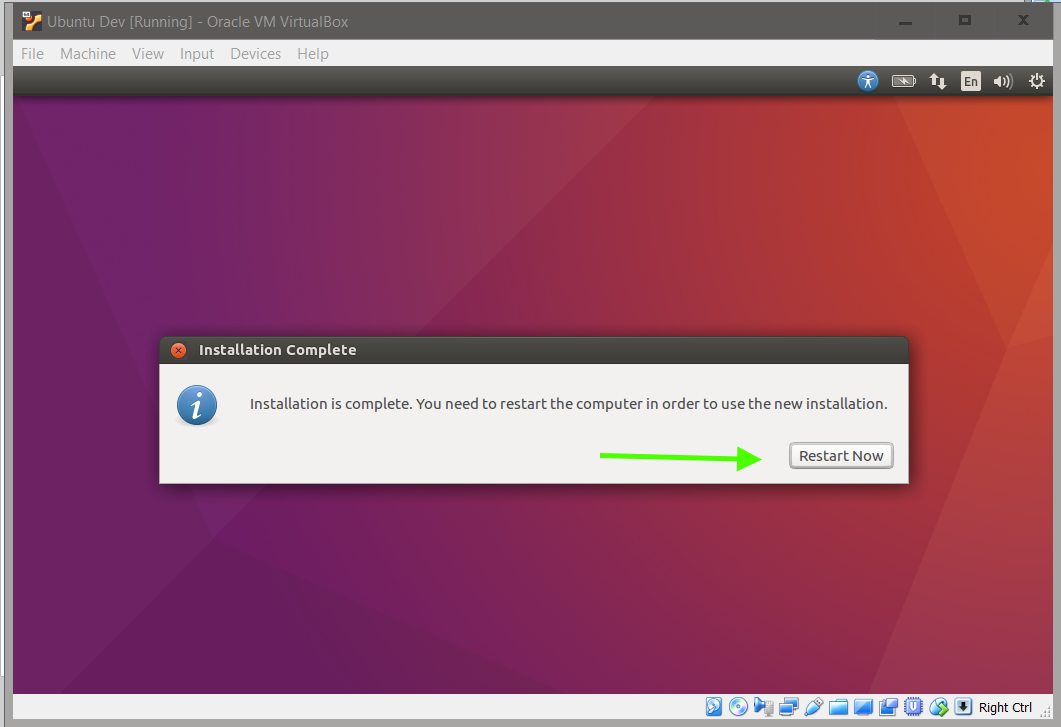
And now wait, for Ubuntu to install and download updates
And reboot, the VM, to finish installation.
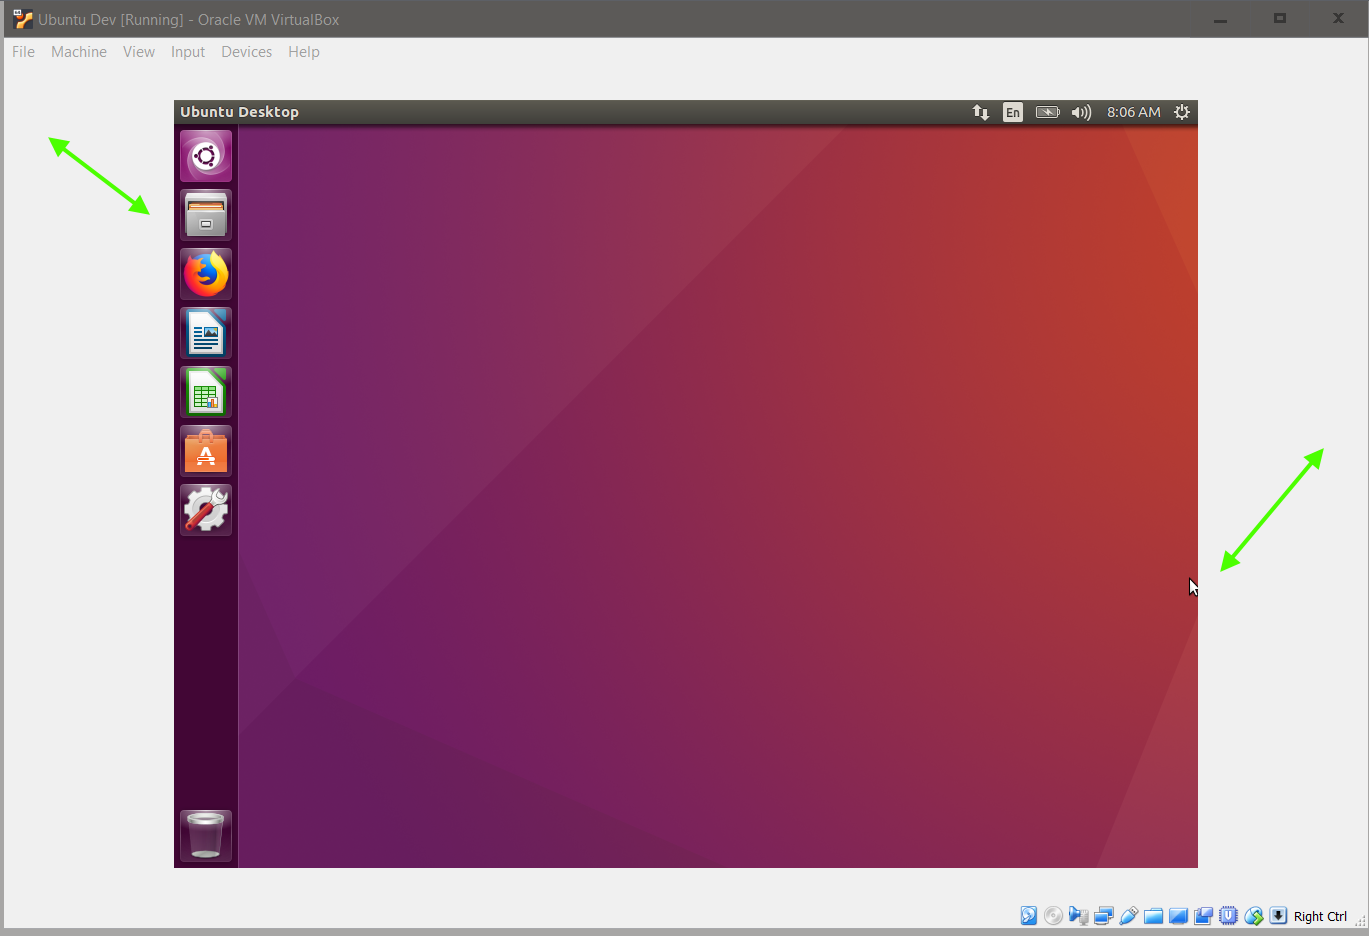
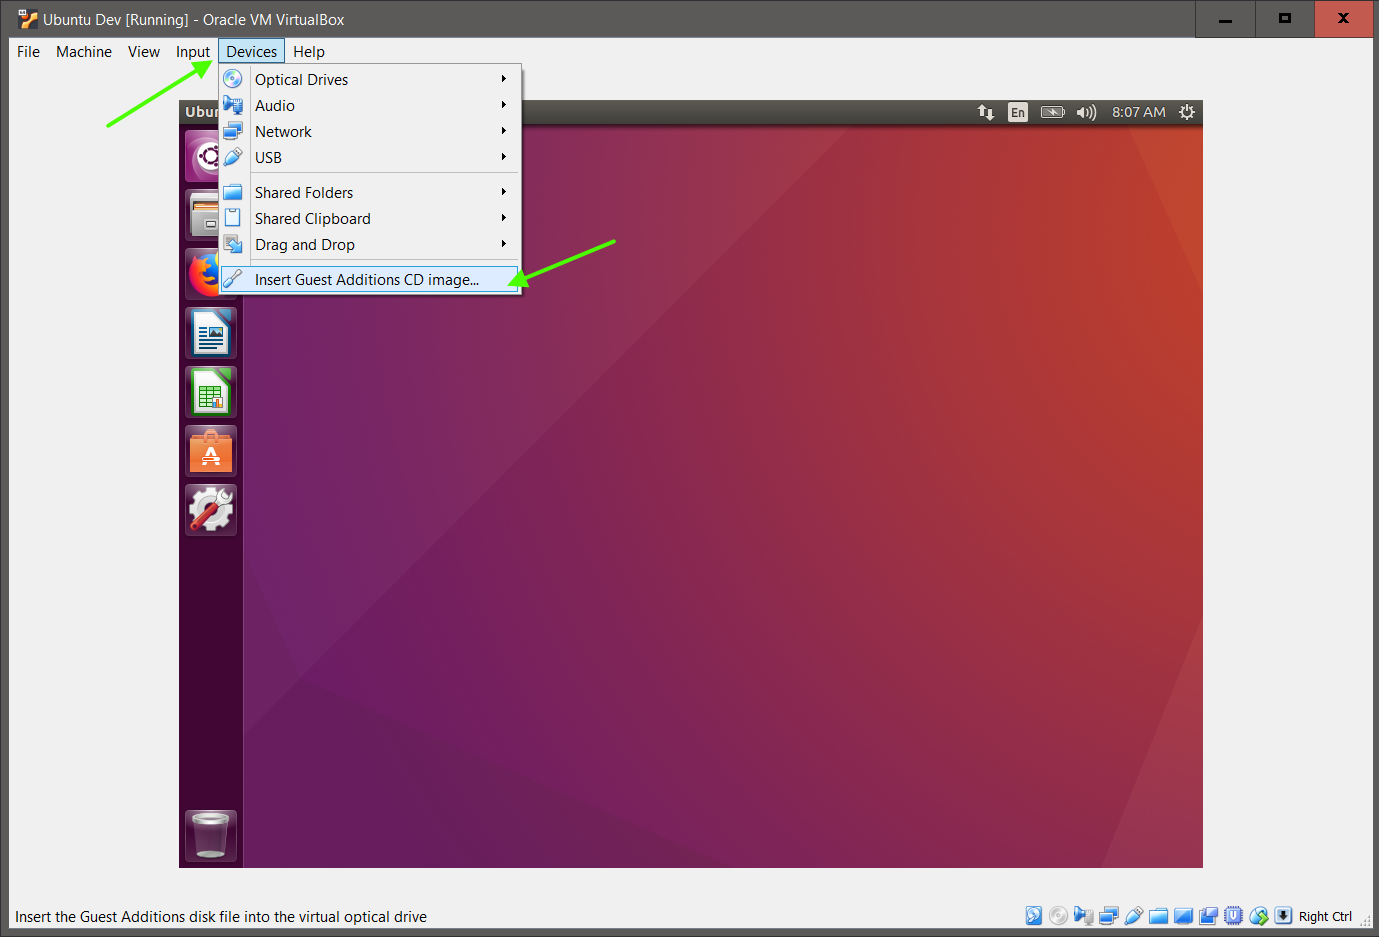
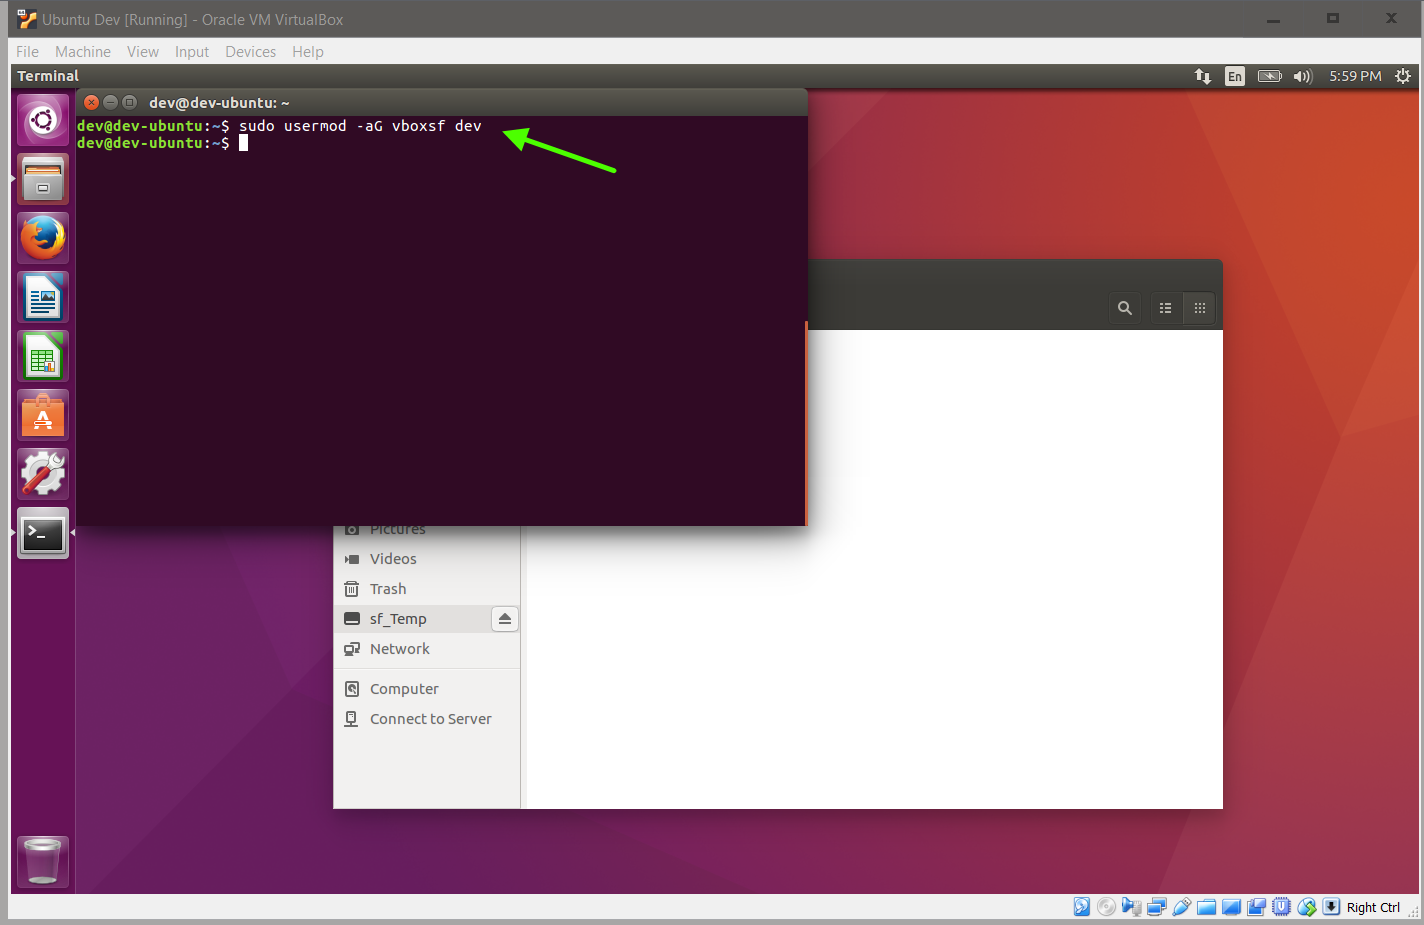
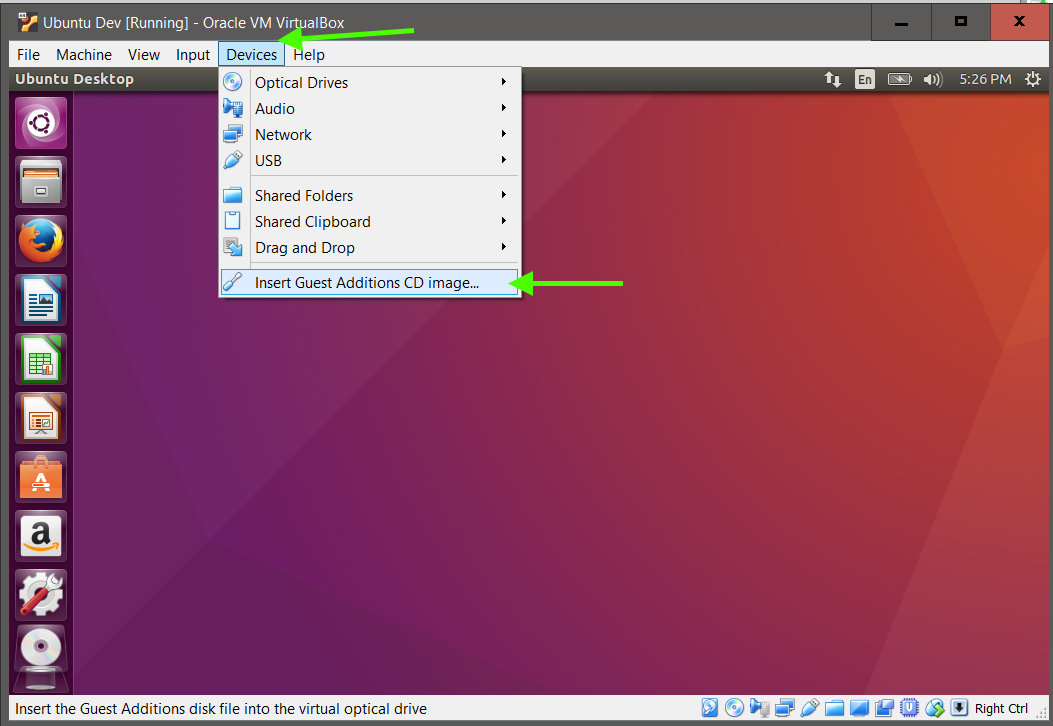
To enable some of the additional functionality of VirtualBox, such as shared Clipboard, Shared Drives, Video acceleration, you will have to install VirtualBox Guest Additions in the VM, ie in Ubuntu.
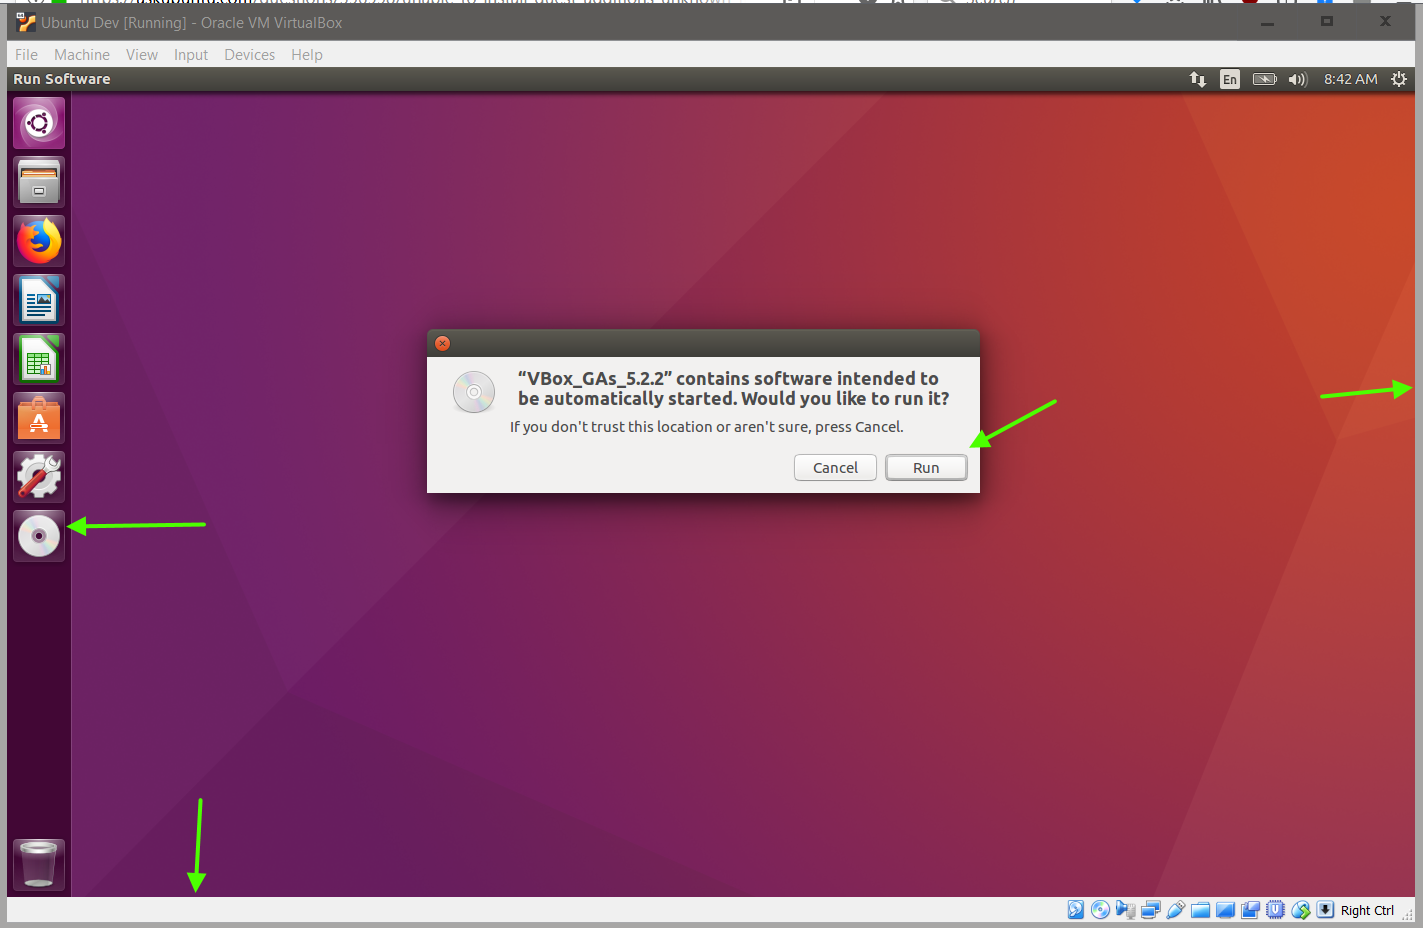
This will mount a VirtualBox image within your VM OS
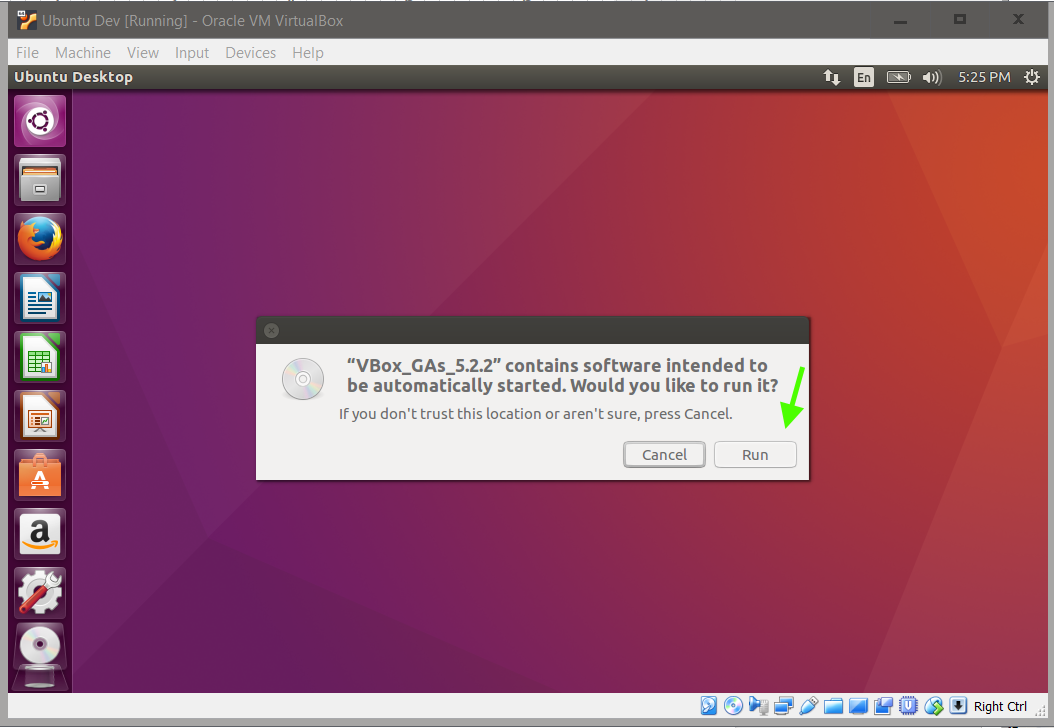
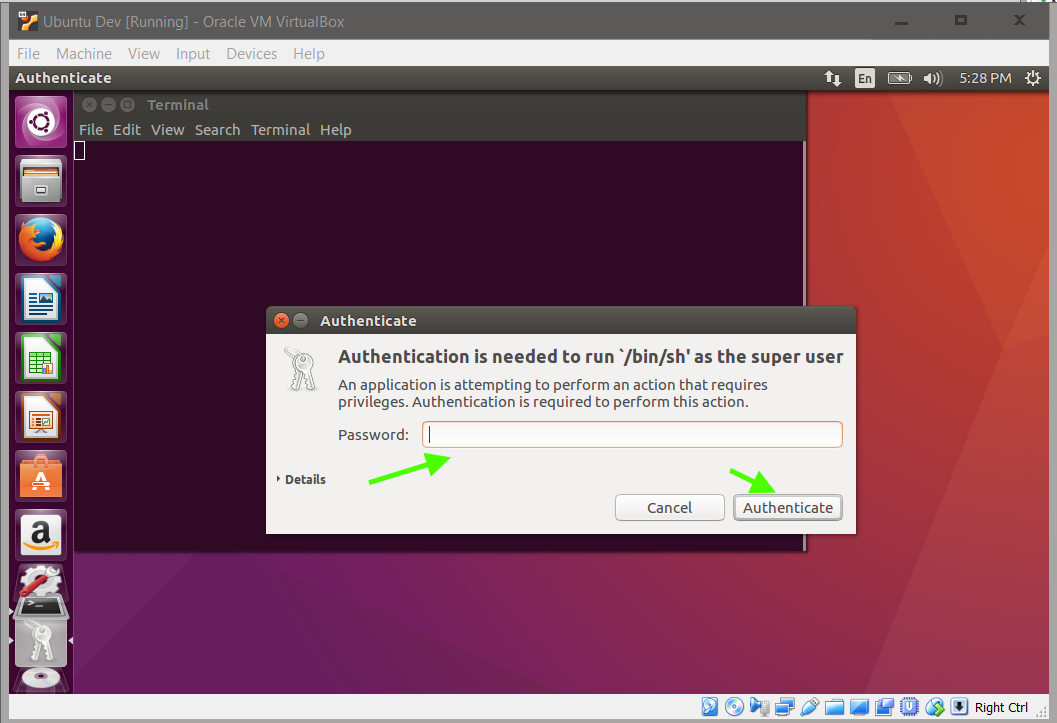
Click Run
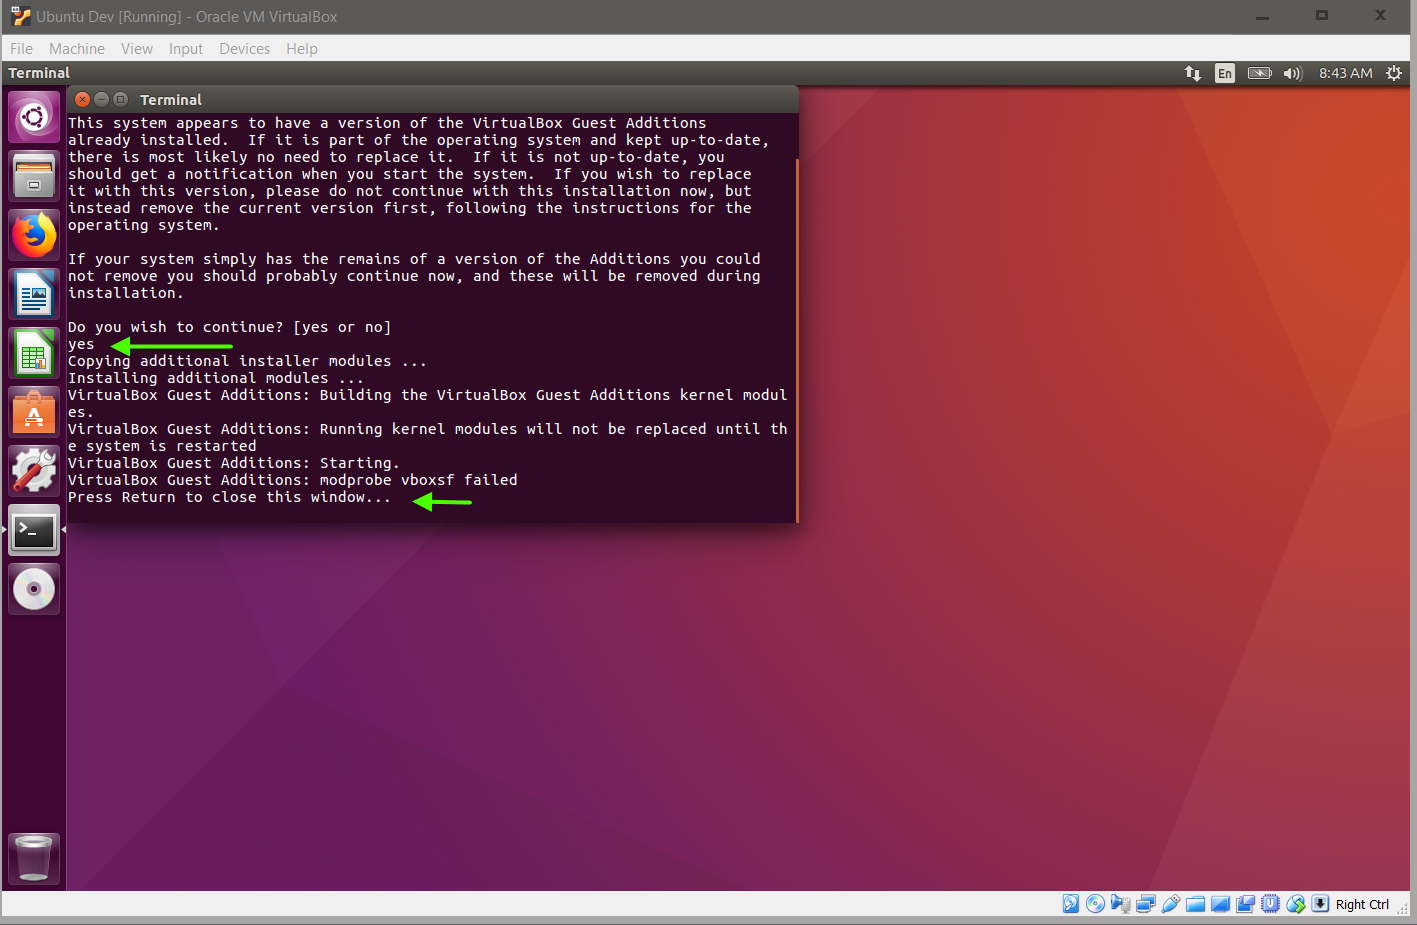
Ubuntu requires sudo, aka root or administrator, privileges often to perform system configurations. Enter the root password.
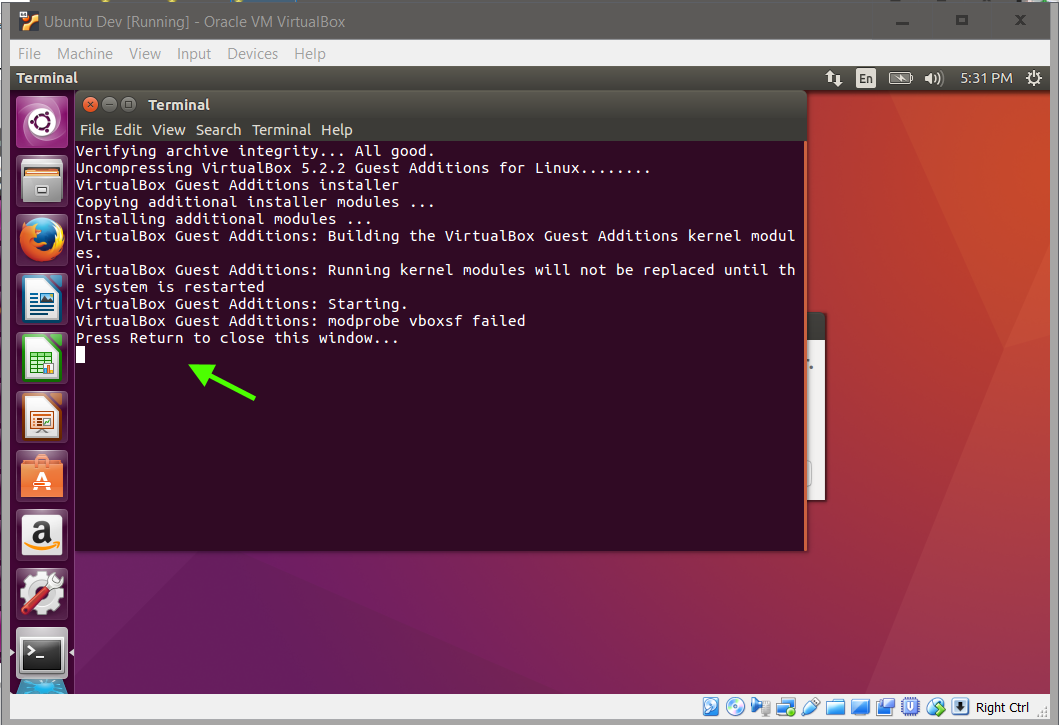
A Linux kernel module will be created which will enable the additional VirtualBox features in the Ubuntu VM, such has shared folders, better video scaling for resizing the window, etc. Press Enter to close the window.
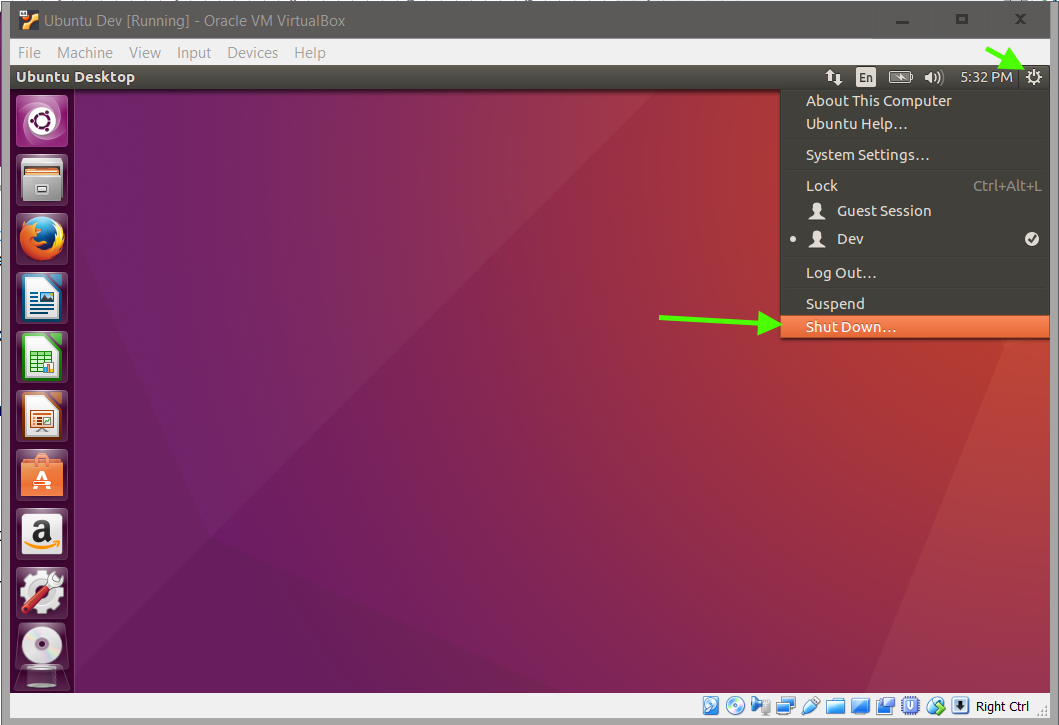
Restart the Ubuntu VM once more.
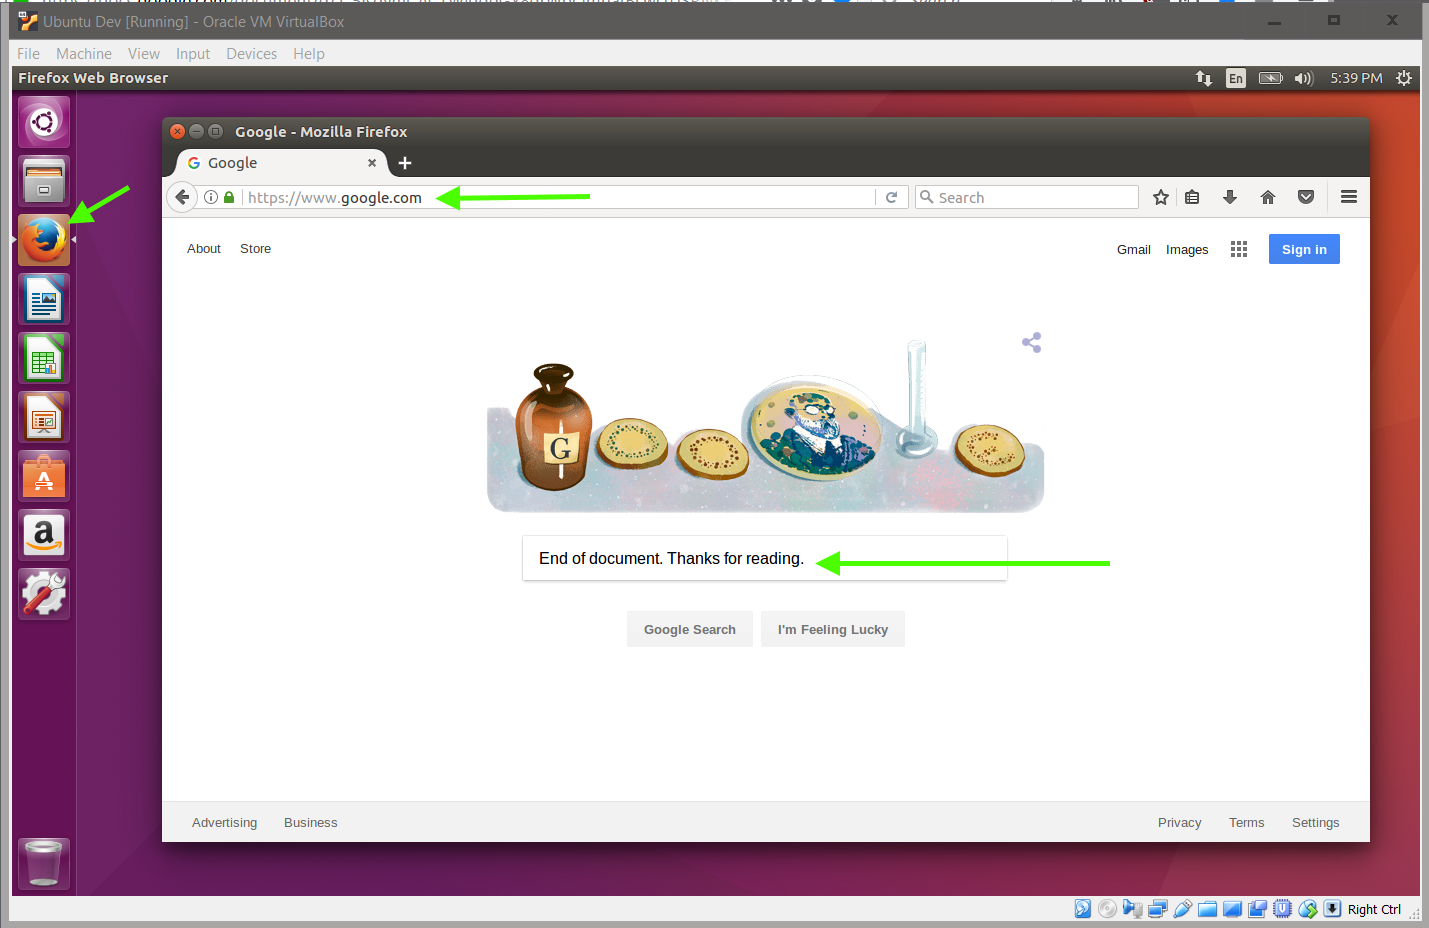
And now you have a fully functional Ubuntu VM. Enjoy.